Form 로그인 및 로그아웃 테스트
✒️ 2025-07-02 11:26 내용 수정
FormLogin 동작
- 참고 자료 : Spring Form Login
- Spring Security에선 HTML
<form>을 사용한username과password로그인을 지원한다. - Controller에서
POST /login추가 없이SecurityFilter에서 로그인 요청을 가로채서 로그인 동작을 처리한다. - 로그인과 로그아웃 동작은 Security가 제공하는
SecurityFilter로 처리하고, 다른 비즈니스 로직이나 커스텀 view mapping만 Controller에서 처리하는 식으로 프로젝트를 관리할 수 있다.
로그인 과정
- 사용자가 인증되지 않은 HTTP 요청을 전송한다.
AuthorizationFilter가 인증되지 않은 요청을 차단한다.AccessDeniedException예외를 던진다.
ExceptionTranslationFilter에서 인증을 시작하고,AuthenticationEntryPoint로 식별된 로그인 페이지로 리다이렉션한다.- 브라우저는 이를 수신하여 사용자를 로그인 페이지로 보낸다.
- 사용자가
usernmae과password를 입력하여 POST 요청을 전송한다. UsernamePasswordAuthenticationFilter에서HttpServletRequest인스턴스에 포함된username과password를 추출하여Authentication종류 중 하나인UsernamePasswordAuthenticationToken을 생성한다.UsernamePasswordAuthenticationToken을AuthenticationManager객체에 전달한다.AuthenticationManager는 인증 성공 및 실패 시 동작을 처리한다.- 인증 실패 시
SecurityContextHolder를 비운다.- RememberMe를 구성했었다면
RememberMeServices.loginFail이 호출된다. AuthenticationFailureHandler가 호출되어 로그인 실패 후 동작을 처리한다.
- 인증 성공 시
SessinoAuthenticationStrategy가 새 로그인을 인지한다.SecurityContextPersistenceFilter가Authentication을SecurityContextHolder에 저장한다.- RememberMe를 구성했다면
RememberMeServices.loginSuccess가 호출된다. ApplicationEventPublisher가InteractiveAuthenticationSuccessEvent를 만든다.AuthenticationSuccessHandler가 호출되어 로그인 성공 후 동작을 처리한다.
- 인증 실패 시
기본 Login Form 설정 시 keypoint
- HTML Form에는
/login요청을postMethod로 전송해야 한다.
<!-- thymeleaf 적용 -->
<html xmlns:th="http://www.thymeleaf.org">
<body>
	<!-- 중간 생략 -->
	<form th:action="@{/login}" method="post"></form>
</body>
</html>
- CSRF Token이 Thymeleaf에 의해 자동으로 포함되며, Form에서도 CSRF Token을 포함해야 한다.
HttpServletRequest의_csrf로 추가된다.
<form th:action="@{/login}" method="post">
	<input type="hidden"
		th:name="${_csrf.parameterName}"
		th:value="${_csrf.token}"/>
</form>
- 사용자 이름인
username인name=username으로 지정해야 한다. - 비밀번호
password도name=password로 지정해야 한다.
<form th:action="@{/login}" method="post">
	<input type="hidden"
		th:name="${_csrf.parameterName}"
		th:value="${_csrf.token}"/>

	<input type="text" name="username"/>
	<input type="password" name="password"/>
</form>
- HTTP 파라미터에서
error가 있다면 사용자에게username이나password입력이 잘못되었다는 것을 알려줘야 한다./login?error와 같은 형식
- HTTP 파라미터에서
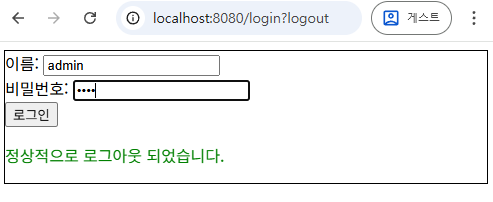
logout이 있다면 로그아웃을 성공적으로 했다는 것을 알려줘야 한다./login?logout과 같은 형식
<div th:if="${param.error}">
    <p style="color:red">로그인 정보가 올바르지 않습니다</p>
</div>
<div th:if="${param.logout}">
    <p style="color:green">정상적으로 로그아웃 되었습니다.</p>
</div>

<form th:action="@{/login}" method="post">
	<input type="hidden"
		th:name="${_csrf.parameterName}"
		th:value="${_csrf.token}"/>

	<input type="text" name="username"/>
	<input type="password" name="password"/>
</form>
Logout
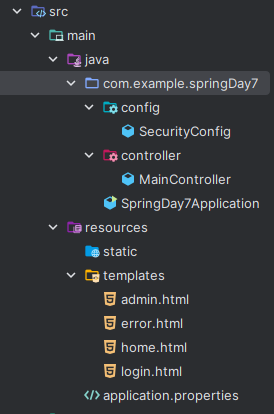
실습 프로젝트
- Spring MVC 패턴으로 작성한다.
- Spring Security 설정을 위한
SecurityConfig클래스를 추가한다. - 페이지 라우팅에 사용할
MainController를 추가한다. - 기타 View 파일을 추가한다.
의존성 설정
- Spring Security, Thymeleaf, Spring Web 의존성을 추가한다.
<dependencies>
	<!-- Spring Security -->
	<dependency>
		<groupId>org.springframework.boot</groupId>
		<artifactId>spring-boot-starter-security</artifactId>
	</dependency>
	<!-- Thymeleaf -->
	<dependency>
		<groupId>org.springframework.boot</groupId>
		<artifactId>spring-boot-starter-thymeleaf</artifactId>
	</dependency>
	<!-- Spring Web -->
	<dependency>
		<groupId>org.springframework.boot</groupId>
		<artifactId>spring-boot-starter-web</artifactId>
	</dependency>
	<!-- Spring Security + Thyemleaf -->
	<dependency>
		<groupId>org.thymeleaf.extras</groupId>
		<artifactId>thymeleaf-extras-springsecurity6</artifactId>
	</dependency>

	<!-- Spring Test -->
	<dependency>
		<groupId>org.springframework.boot</groupId>
		<artifactId>spring-boot-starter-test</artifactId>
		<scope>test</scope>
	</dependency>
	<dependency>
		<groupId>org.springframework.security</groupId>
		<artifactId>spring-security-test</artifactId>
	<scope>test</scope>
	</dependency>

	<!-- H2 Database -->
	<dependency>
		<groupId>com.h2database</groupId>
		<artifactId>h2</artifactId>
		<version>2.3.230</version>
	</dependency>
</dependencies>
Controller 설정
home페이지,admin페이지,login페이지 라우트를 설정한다.- 각 View 파일로 mapping한다.
Principal은 사용자의 정보를 가지고 있는 인증 관련 인터페이스로,Authentication인터페이스가 상속한다.- Security Context 참고.
// MainController
import org.springframework.stereotype.Controller;
import org.springframework.ui.Model;
import org.springframework.web.bind.annotation.GetMapping;

import java.security.Principal;

@Controller
public class MainController {
    @GetMapping({"/", "/home"})
    public String home(Principal principal, Model model) {
        model.addAttribute("username", principal.getName());
        return "home";
    }

    @GetMapping("/admin")
    public String admin(Principal principal, Model model) {
        model.addAttribute("username", principal.getName());
        return "admin";
    }

    @GetMapping("/login")
    public String login() {
        return "login";
    }
}
SecurityConfig 설정
- Security 설정 시
SecurityConfig는@ConfigurationAnnotation을 사용하여 설정용 클래스임을 명시한다. @EnabelWebSecurityAnnotation을 사용하면 Spring Security 기본 설정이 적용된다.
@Configuration
@EnableWebSecurity // Spring Security 자동 활성화
public class SecurityConfig { }
SecurityConfig클래스에서SecurityFilterChain이나 기타 필요한 객체는@BeanAnnotation을 사용한 Bean으로 등록한다.SecurityFilterChain은HttpSecurity를 사용하여SecurityFilter를 적용한다.- SecurityFilterChain 참고.
- 예외 처리를 반드시 추가해야 한다.
@Bean
public SecurityFilterChain filterChain(HttpSecurity http) throws Exception { }
- 인메모리 설정을 통해 DB 없이 로그인 동작을 테스트했다.
UserDetails인터페이스를 사용하여 사용자 객체를 생성한다.username,password,role을 설정한다.
// 인메모리 DB 설정
// 사용자 객체를 인메모리 DB에 추가
@Bean
public InMemoryUserDetailsManager userDetailsManager() {
	UserDetails user = User.withDefaultPasswordEncoder()
			.username("user")
			.password("1234")
			.roles("USER")
			.build();

	UserDetails admin = User.withDefaultPasswordEncoder()
			.username("admin")
			.password("aaaa")
			.roles("ADMIN")
			.build();

	return new InMemoryUserDetailsManager(user, admin);
}
- 전체
SecurityConfig는 아래처럼 작성했다.
// SecurityConfig
import org.springframework.context.annotation.Bean;
import org.springframework.context.annotation.Configuration;
import org.springframework.security.config.Customizer;
import org.springframework.security.config.annotation.web.builders.HttpSecurity;
import org.springframework.security.config.annotation.web.configuration.EnableWebSecurity;
import org.springframework.security.core.userdetails.User;
import org.springframework.security.core.userdetails.UserDetails;
import org.springframework.security.provisioning.InMemoryUserDetailsManager;
import org.springframework.security.web.SecurityFilterChain;

@Configuration
@EnableWebSecurity
public class SecurityConfig {

    // 인메모리 DB 설정
    // 사용자 객체를 인메모리 DB에 추가
    @Bean
    public InMemoryUserDetailsManager userDetailsManager() {
        UserDetails user = User.withDefaultPasswordEncoder()
                .username("user")
                .password("1234")
                .roles("USER")
                .build();

        UserDetails admin = User.withDefaultPasswordEncoder()
                .username("admin")
                .password("aaaa")
                .roles("ADMIN")
                .build();

        return new InMemoryUserDetailsManager(user, admin);
    }

    // Filter Chain 설정
    @Bean
    public SecurityFilterChain filterChain(HttpSecurity http) throws Exception {
        http
                // HTTP 요청의 인가 설정
                // URL별 접근 설정
                .authorizeHttpRequests(auth->auth
                        .requestMatchers("/login", "/error").permitAll()
                        .requestMatchers("/admin").hasRole("ADMIN")
                        .anyRequest().authenticated()
                )
                // form을 사용한 로그인 설정
                .formLogin(form->form
                        .loginPage("/login") // 로그인 페이지
                        .defaultSuccessUrl("/home", true) // 로그인 성공 시 URL
                        .permitAll() // 접근 권한 모두 허용
                )
                // 로그아웃
                .logout(logout->logout
						.logoutUrl("/logout") // 로그아웃 요청 URL
						.logoutSuccessUrl("/login?logout") // 로그아웃 성공 시 URL
                        .invalidateHttpSession(true) // HTTP Session 무효화
                        .deleteCookies("JSESSIONID") // 쿠키 제거
                        .permitAll() // 접근 권한 모두 허용
                )
                .httpBasic(Customizer.withDefaults()); // 인증, 인가 테스트
        return http.build();
    }
}
view 설정
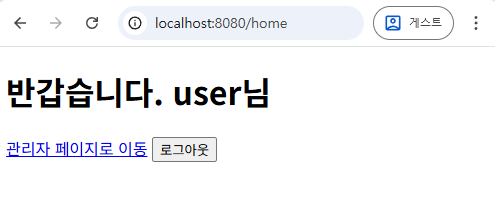
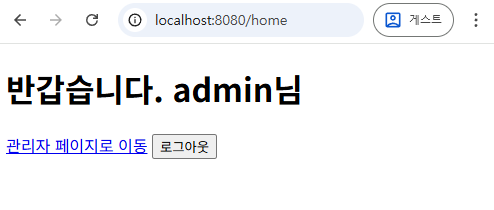
1) home.html
- 로그인 후 접속하는 페이지로, 로그인하지 않으면 접근할 수 없다.
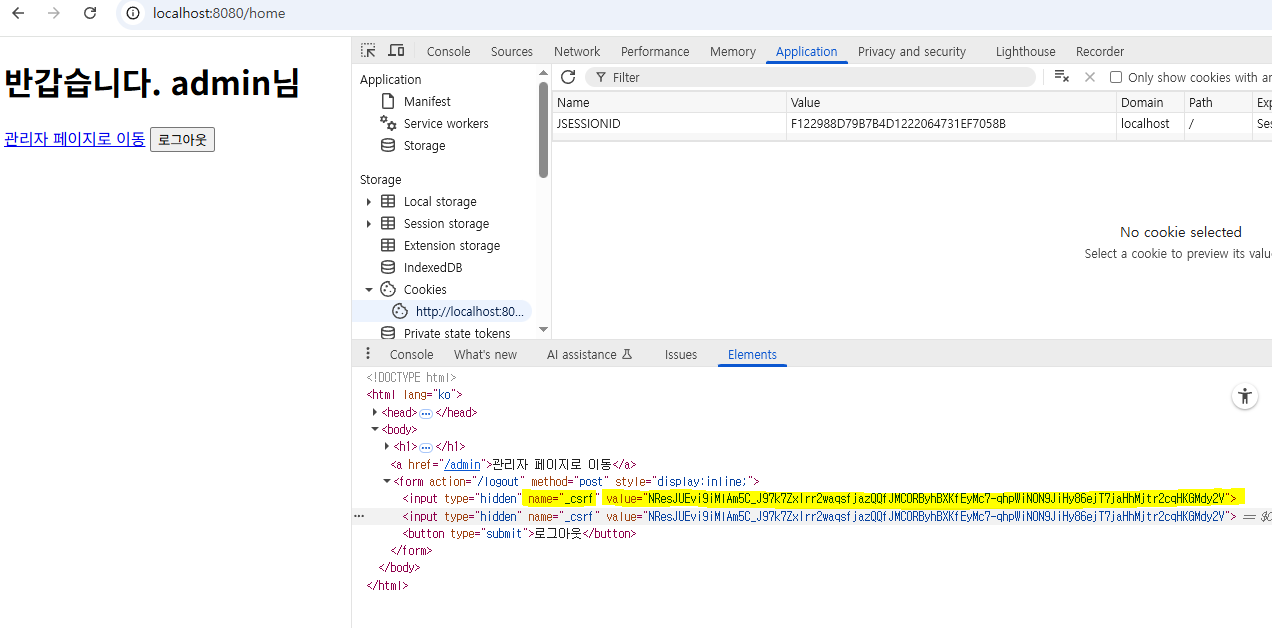
- 로그아웃에는
_csrf를 사용하여 CSRF Token을 요청 전송 시 함께 보낼 수 있도록 설정한다.
<!doctype html>
<html lang="ko" xmlns:th="http://www.thymeleaf.org">
<head>
    <meta charset="UTF-8">
    <title>Home</title>
</head>
<body>
    <h1>반갑습니다. <span th:text="${username}"></span>님</h1>
    <a th:href="@{/admin}">관리자 페이지로 이동</a>
    <form th:action="@{/logout}" method="post" style="display:inline;">
        <input type="hidden"
        th:name="${_csrf.parameterName}" th:value="${_csrf.token}">
        <button type="submit">로그아웃</button>
    </form>
</body>
</html>
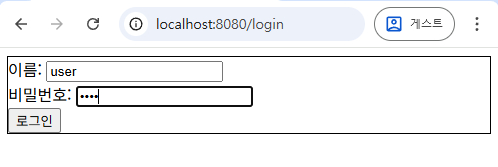
2) login.html
- 로그인 요청
<form>은POST /login요청을 전송하도록 설정한다.
<!doctype html>
<html lang="ko" xmlns:th="http://www.thymeleaf.org">
<head>
    <meta charset="UTF-8">
    <title>Login</title>
</head>
<body>
    <form th:action="@{/login}" method="post">
        <div>
            <label>이름: </label>
            <input type="text" name="username">
        </div>
        <div>
	        <label>비밀번호: </label>
            <input type="password" name="password">
        </div>
        <div>
	        <button type="submit">로그인</button>
        </div>
        <div th:if="${param.error}">
            <p style="color:red">로그인 정보가 올바르지 않습니다</p>
        </div>
        <div th:if="${param.logout}">
            <p style="color:green">정상적으로 로그아웃 되었습니다.</p>
        </div>
    </form>
</body>
</html>
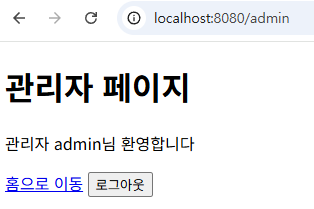
3) admin.html
ADMINRole을 가진 사용자만 접근할 수 있다.- 로그아웃에는
_csrf를 사용하여 CSRF Token을 요청 전송 시 함께 보낼 수 있도록 설정한다.
<!doctype html>
<html lang="ko" xmlns:th="http://www.thymeleaf.org">
<head>
    <meta charset="UTF-8">
    <title>Admin</title>
</head>
<body>
    <h1>관리자 페이지</h1>
    <p>관리자 <span th:text="${username}"></span>님 환영합니다</p>
    <a th:href="@{/home}">홈으로 이동</a>
    <form th:action="@{/logout}" method="post" style="display:inline;">
        <input type="hidden"
	        th:name="${_csrf.parameterName}"
	        th:value="${_csrf.token}">
        <button type="submit">로그아웃</button>
    </form>
</body>
</html>
4) error.html
<!doctype html>
<html lang="ko" xmlns:th="http://www.thymeleaf.org">
<head>
    <meta charset="UTF-8">
    <title>Error</title>
</head>
<body>
    <h1>오류가 발생했습니다.</h1>
    <a th:href="@{/home}">홈으로 이동</a>
</body>
</html>
테스트
- 일반 사용자 로그인 테스트
- 로그아웃 테스트
- 관리자 로그인 테스트
- CSRF Token 확인
- 관리자 페이지 접근 확인