Spring boot로 REST API 구현(JPA)
✒️ 2025-06-24 11:05 내용 수정
스프링부트3 자바 백엔드 개발입문 내용 참고 및 정리
- JPA로 DB Delete 수행하기에 이어 이번엔 Spring boot에서 REST API를 구현한다.
- REST와 REST API, HTTP(Hyper Text Transfer Protocol) 참고.
- MyBatis를 사용하는 실습은 Spring boot로 REST API 구현(MyBatis)에서 진행했다.
- REST API 테스트를 위해 Talend API Test 확장 프로그램을 사용하였다.
- Chrome에 추가 : Talend API Tester - Free Edition
- 확장 프로그램에 추가한 뒤엔 Chrome의 주소창 우측의 퍼즐 버튼을 눌러 확장 프로그램 목록에서 Talend API Test를 설치한다.
RestController 설정
- 기존 프로젝트에 새 패키지
com.example.package_name.api를 추가하고, 패키지에FirstApiController자바 클래스를 생성한다.- 일반
@Controller는 View 페이지를 반환하지만,@RestController는 JSON이나 텍스트와 같은 데이터를 반환한다.
- 일반
package com.example.demo.api;
import org.springframework.web.bind.annotation.GetMapping;
import org.springframework.web.bind.annotation.RequestMapping;
import org.springframework.web.bind.annotation.RestController;
@RestController // REST를 적용한 Controller 사용 표시
@RequestMapping("/api")
public class FirstApiController {
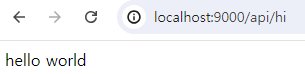
@GetMapping("hi")
public String hello() {
return "hello world";
}
}
REST API로 GET 구현
- REST API와
@RestController의 특징을 이용하여 게시글의 데이터를 가져올 Controller를 생성한다.com.example.package_name.api패키지에ArticleApiController를 생성한다. @RestControllerAnnotation을 추가하고, 공통적인 Path 지정을 위해@RequestMappingAnnotation을 사용하여/api로 시작하는 요청임을 지정한다.ArticleRepository를 자동 주입한 후,@GetMapping들을 추가하여 게시글의 데이터를 가져올 수 있도록 설정한다.
package com.example.demo.api;

import com.example.demo.entity.Article;
import com.example.demo.repository.ArticleRepository;
import lombok.extern.slf4j.Slf4j;
import org.springframework.beans.factory.annotation.Autowired;
import org.springframework.web.bind.annotation.GetMapping;
import org.springframework.web.bind.annotation.PathVariable;
import org.springframework.web.bind.annotation.RequestMapping;
import org.springframework.web.bind.annotation.RestController;

import java.util.ArrayList;

@RestController // REST를 적용한 Controller 사용 표시
@RequestMapping("/api")
@Slf4j // simple logging facade for java
public class ArticleApiController {

    @Autowired
    private ArticleRepository articleRepository;

    // GET
    @GetMapping("articles") // 게시글 전체 조회
    public ArrayList<Article> index() {
        return (ArrayList<Article>) articleRepository.findAll();
    }

    @GetMapping("articles/{id}") // 특정 게시글 조회
    public Article show(@PathVariable Long id) {
        return articleRepository.findById(id).orElse(null);
    }
}
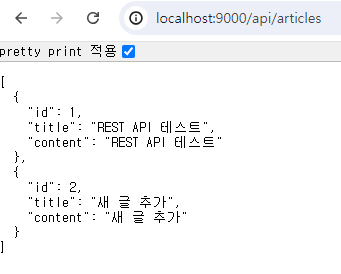
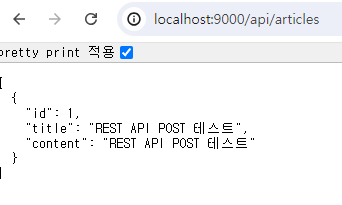
- JPA로 DB Create 수행하기에서 만들어둔 글 추가 기능을 이용해 글을 추가하고, URL에
http://localhost:port/api/articles와http://localhost:port/api/articles/id를 입력해 데이터가 출력 되는 것을 확인할 수 있다.
REST API로 POST 구현
ArticleApiController에@PostMapping을 추가한다.- 이 때 요청의 본문(body)에 있는 데이터를 사용하기 위해선
@RequestBodyAnnotation을 사용한다. - REST API에서 데이터를 생성할 때는 JSON 데이터를 받아와야 하기 때문에 DTO만 작성해서는 데이터를 가져올 수 없다.
- 이 때 요청의 본문(body)에 있는 데이터를 사용하기 위해선
package com.example.demo.api;

import com.example.demo.DTO.ArticleForm;
import com.example.demo.entity.Article;
import com.example.demo.repository.ArticleRepository;
import lombok.extern.slf4j.Slf4j;
import org.springframework.beans.factory.annotation.Autowired;
import org.springframework.web.bind.annotation.*;

import java.util.ArrayList;

@RestController // REST를 적용한 Controller 사용 표시
@RequestMapping("/api")
@Slf4j // simple logging facade for java
public class ArticleApiController {

    @Autowired
    private ArticleRepository articleRepository;

    // GET
    @GetMapping("articles") // 게시글 전체 조회
    public ArrayList<Article> index() {
        return (ArrayList<Article>) articleRepository.findAll();
    }

    @GetMapping("articles/{id}") // 특정 게시글 조회
    public Article show(@PathVariable Long id) {
        return articleRepository.findById(id).orElse(null);
    }

    // POST
    @PostMapping("articles") // 새 글 작성
    public Article create(@RequestBody ArticleForm dto) { // 요청 시 본문에 포함되는 데이터를 사용
        Article article = dto.toEntity();
        return articleRepository.save(article);
    }
}
- Talent API Test에서
http://localhost:port/api/articles에 POST 요청을 전송한다.
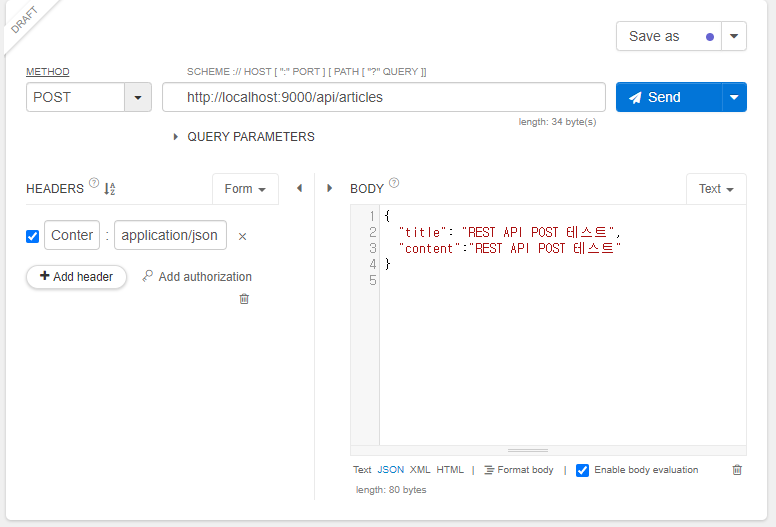
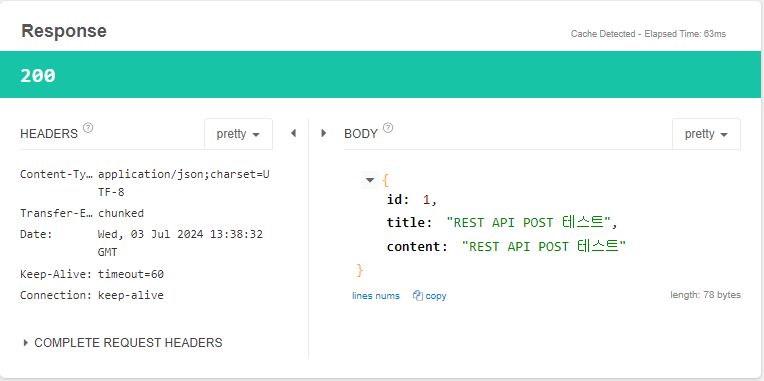
- Send를 누른 후 요청이 제대로 전송되었다면 Response에 응답 코드가
200으로 뜨고, Body의 내용도 보냈던 데이터와 동일한 것을 확인할 수 있다.
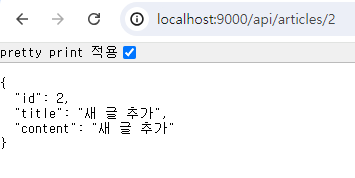
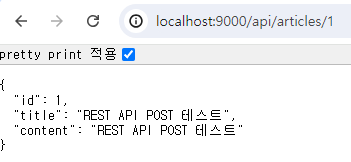
- 브라우저에서
http://localhost:port/api/articles/{id}를 입력해 방금 추가한 데이터를 조회했을 때도 동일한 데이터가 나오는 것을 확인할 수 있다.
REST API로 PATCH 구현
ArticleApiController에@PatchMapping을 추가한다.- 이 때 요청의 본문(body)에 있는 데이터를 사용하기 위해선
@RequestBodyAnnotation을 사용한다. - 요청에 포함된 path variable을 사용하기 위해
@PathVariableAnnotation도 사용한다. - 만약 사용자가 요청하는 id를 가진 데이터가 없거나, 수정할 데이터의 id와 요청 id가 다른 경우엔 수정을 진행하면 안되므로 잘못된 요청 처리를 해줘야 한다.
ResponseEntity는 REST API의 응답을 위해 사용하는 클래스로, HTTP 상태 코드, Header, 본문(body)를 보낼 수 있다.HttpStatus는 HTTP 상태 코드를 관리하는 클래스다.- HTTP 상태 코드 참고.
- 이 때 요청의 본문(body)에 있는 데이터를 사용하기 위해선
| 분류 | 코드 | field | 설명 |
|---|---|---|---|
| 2xx | 성공을 알리는 상태 코드 | ||
| 200 | HttpStatus.OK |
성공함, | |
| 201 | HttpStatus.CREATED |
작성됨 | |
| 3xx | 리다이렉션(다른 페이지로 이동)을 알리는 상태 코드 | ||
| 301 | HttpStatus.MOVED_PERMANENTLY |
영구 이동 | |
| 302 | HttpStatus.MOVED_TEMPORARILY |
임시 이동 | |
| 304 | HttpStatus.NOT_MODIFIED |
수정되지 않음. 요청의 응답으로 캐시를 사용 | |
| 4xx | 요청 요류를 알리는 상태 코드. 요청 자체에 오류가 있을 때 표시 | ||
| 400 | HttpStatus.BAD_REQUEST |
잘못된 요청 | |
| 401 | HttpStatus.UNAUTHORIZED |
권한 없음 | |
| 403 | HttpStatus.FORBIDDEN |
금지됨. 401과 비슷함 | |
| 404 | HttpStatus.NOT_FOUND |
찾을 수 없음 | |
| 5xx | 서버 오류를 나타내는 상태 코드. 요청은 제대로 왔으나 서버에 오류가 생겼을 때 표시 | ||
| 500 | HttpStatus.INTERNAL_SERVER_ERROR |
내부 서버 오류 | |
| 502 | HttpStatus.BAD_GATEWAY |
불량 게이트웨이 | |
| 503 | HttpStatus.SERVICE_UNAVAILABLE |
서비스 이용 불가 |
package com.example.demo.api;

import com.example.demo.DTO.ArticleForm;
import com.example.demo.entity.Article;
import com.example.demo.repository.ArticleRepository;
import lombok.extern.slf4j.Slf4j;
import org.springframework.beans.factory.annotation.Autowired;
import org.springframework.http.HttpStatus;
import org.springframework.http.ResponseEntity;
import org.springframework.web.bind.annotation.*;

import java.util.ArrayList;

@RestController // REST를 적용한 Controller 사용 표시
@RequestMapping("/api")
@Slf4j // simple logging facade for java
public class ArticleApiController {

    @Autowired
    private ArticleRepository articleRepository;

    // GET
    @GetMapping("articles") // 게시글 전체 조회
    public ArrayList<Article> index() {
        return (ArrayList<Article>) articleRepository.findAll();
    }

    @GetMapping("articles/{id}") // 특정 게시글 조회
    public Article show(@PathVariable Long id) {
        return articleRepository.findById(id).orElse(null);
    }

    // POST
    @PostMapping("articles") // 새 글 작성
    public Article create(@RequestBody ArticleForm dto) { // 요청 시 본문에 포함되는 데이터를 사용
        Article article = dto.toEntity();
        return articleRepository.save(article);
    }

    // PATCH
    @PatchMapping("articles/{id}") // 기존 글 수정
    public ResponseEntity<Article> update( // 반환형에 유의한다.
	    @PathVariable Long id,
	    @RequestBody ArticleForm dto
     ) { // 요청 시 본문에 포함되는 데이터를 사용
        // 들어온 데이터 변환
        Article article = dto.toEntity();

        // 수정 대상 조회
        Article target = articleRepository.findById(id).orElse(null);

        // 잘못된 요청 처리
        // 해당 id의 데이터가 없거나, 요청 id와 수정할 데이터의 id가 다른 경우
        if (target == null || id != article.getId()) {
            // 400 코드 전송
            return ResponseEntity.status(HttpStatus.BAD_REQUEST).body(null);
        }

        // DB에 수정 내용 저장
        target.patch(article); // 기존 데이터에 새 데이터 붙이기(일부만 수정 시 null 방지)
        Article updated = articleRepository.save(article);
        // 200 코드와 수정 결과 전송
        return ResponseEntity.status(HttpStatus.OK).body(updated);
    }
}
- 만약 데이터에서 일부 항목만 수정하는 경우, 입력 값에는 일부 데이터가 없는 상태로 DB에 넘어가게 되어 기존 데이터가 삭제될 수 있다. 따라서
Article에 새 데이터를 넘겨 받는 경우 해당 데이터에 값이 존재하는지 여부에 따라 기존 데이터를 남겨두거나 대체하는 메소드를 추가해야 한다.
package com.example.demo.entity;

import jakarta.persistence.*;
import lombok.AllArgsConstructor;
import lombok.Data;
import lombok.NoArgsConstructor;

@Entity // Entity임을 명시하는 Annotation@Data // Lombok
@NoArgsConstructor
public class Article {

    @Id // 식별자
    @GeneratedValue(strategy = GenerationType.IDENTITY)
    private Long id;

    @Column // DB에서 열과 대응되는 속성
    private String title;

    @Column
    private String content;

    public Article(Long id, String title, String content) {
        this.id = id;
        this.title = title;
        this.content = content;
    }

    public void patch(Article article) { // 새 데이터가 들어올 때 값이 있을 때만 수정
        if (article.title != null) {
            this.title = article.title;
        }
        if (article.content != null) {
            this.content = article.content;
        }
    }
}
- 수정 테스트를 위해 먼저 데이터를 추가한다.
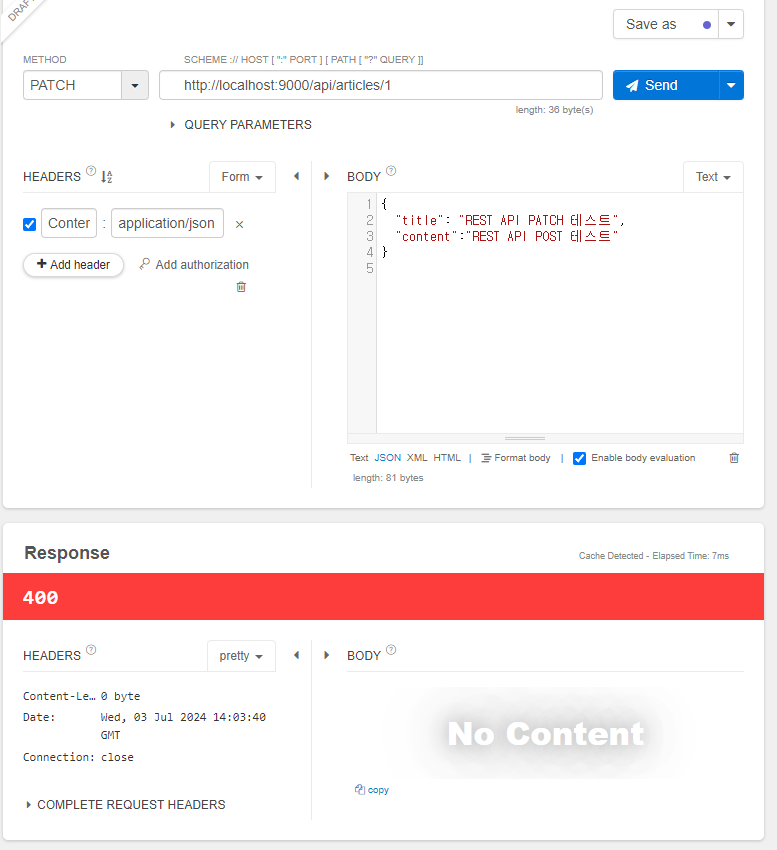
- Talend API Test에서 PATCH 요청으로 title과 content만 있는 상태에서 요청을 보내면 요청 JSON 데이터에는
id가 없어400응답이 돌아온다.
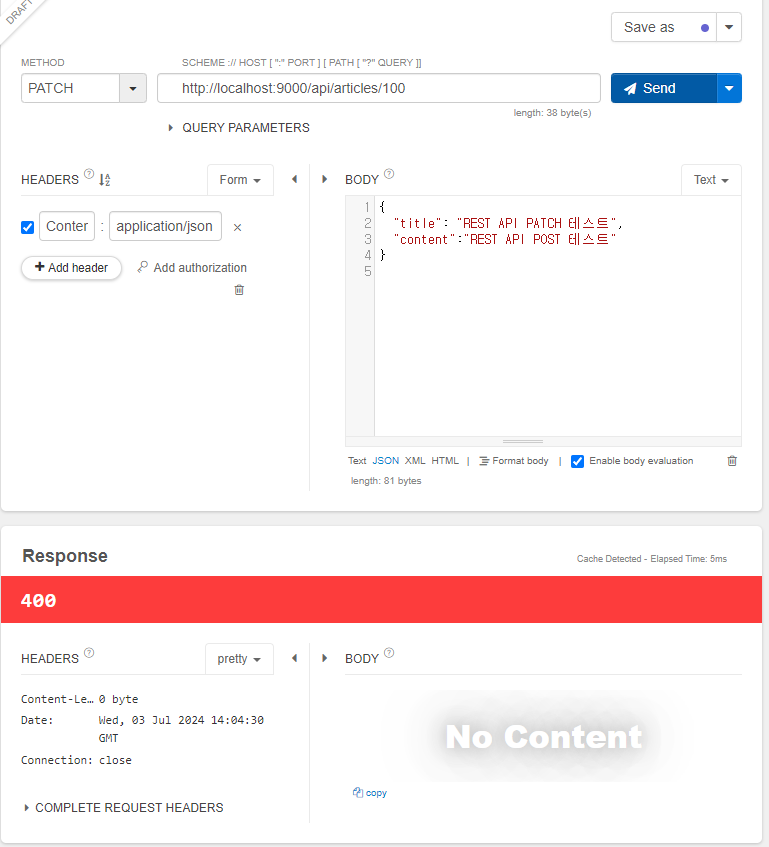
- 이번엔 요청 URL의
id가 DB에 존재하지 않는id일 경우, 마찬가지로400응답이 돌아온다.
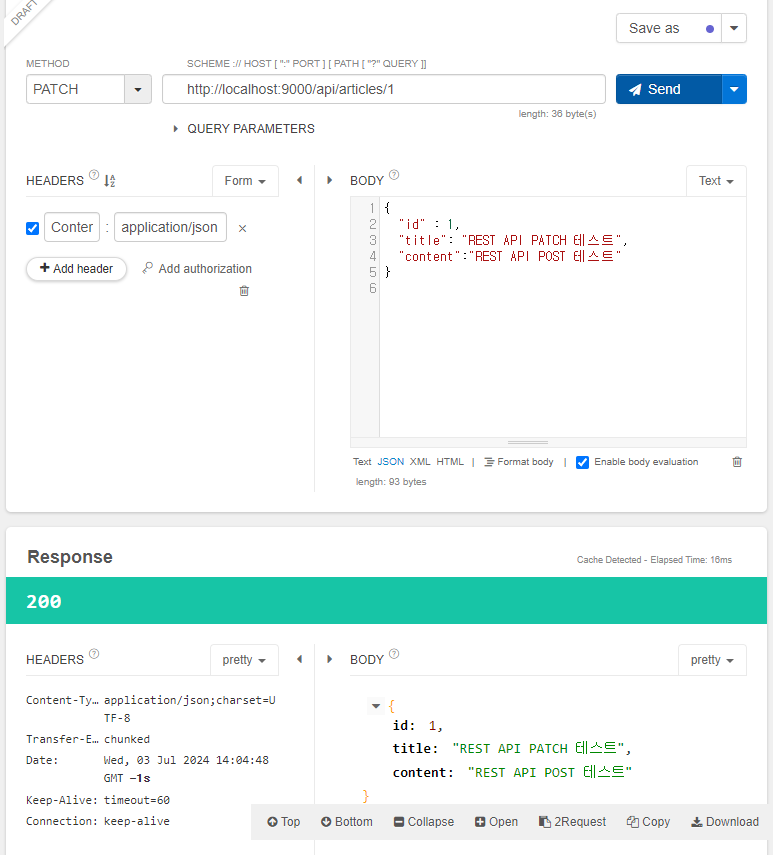
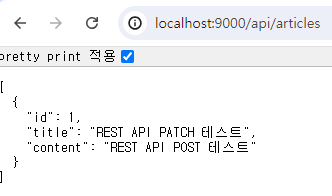
- 요청
id와 JSON 데이터의 형식을 모두 갖추고 요청을 보내면200응답이 돌아오며, 브라우저에서http://localhost:port/api/articles를 입력해 데이터를 확인했을 때도 수정한 데이터로 표시된다.
REST API로 DELETE 구현
- REST API와
@RestController의 특징을 이용하여 게시글의 데이터를 가져올 Controller를 생성한다.com.example.package_name.api패키지에ArticleApiController를 생성한다.
package com.example.demo.api;

import com.example.demo.DTO.ArticleForm;
import com.example.demo.entity.Article;
import com.example.demo.repository.ArticleRepository;
import lombok.extern.slf4j.Slf4j;
import org.springframework.beans.factory.annotation.Autowired;
import org.springframework.http.HttpStatus;
import org.springframework.http.ResponseEntity;
import org.springframework.web.bind.annotation.*;

import java.util.ArrayList;

@RestController // REST를 적용한 Controller 사용 표시
@RequestMapping("/api")
@Slf4j // simple logging facade for java
public class ArticleApiController {

    @Autowired
    private ArticleRepository articleRepository;

    // GET
    @GetMapping("articles") // 게시글 전체 조회
    public ArrayList<Article> index() {
        return (ArrayList<Article>) articleRepository.findAll();
    }

    @GetMapping("articles/{id}") // 특정 게시글 조회
    public Article show(@PathVariable Long id) {
        return articleRepository.findById(id).orElse(null);
    }

    // POST
    @PostMapping("articles") // 새 글 작성
    public Article create(@RequestBody ArticleForm dto) { // 요청 시 본문에 포함되는 데이터를 사용
        Article article = dto.toEntity();
        return articleRepository.save(article);
    }

    // PATCH
    @PatchMapping("articles/{id}") // 기존 글 수정
    public ResponseEntity<Article> update( // 반환형에 유의한다.
            @PathVariable Long id,
            @RequestBody ArticleForm dto
    ) { // 요청 시 본문에 포함되는 데이터를 사용
        // 들어온 데이터 변환
        Article article = dto.toEntity();

        // 수정 대상 조회
        Article target = articleRepository.findById(id).orElse(null);

        // 잘못된 요청 처리
        // 해당 id의 데이터가 없거나, 요청 id와 수정할 데이터의 id가 다른 경우
        if (target == null || id != article.getId()) {
            // 400 코드 전송
            return ResponseEntity.status(HttpStatus.BAD_REQUEST).body(null);
        }

        // DB에 수정 내용 저장
        target.patch(article); // 기존 데이터에 새 데이터 붙이기(일부만 수정 시 null 방지)
        Article updated = articleRepository.save(article);
        // 200 코드와 수정 결과 전송
        return ResponseEntity.status(HttpStatus.OK).body(updated);
    }

    // DELETE
    @DeleteMapping("articles/{id}")
    public ResponseEntity<Article> delete(@PathVariable Long id) {

        // 대상 조회
        Article target = articleRepository.findById(id).orElse(null);

        // 대상이 없으면 잘못된 요청으로 처리 - 400        if (target == null) {
            return ResponseEntity.status(HttpStatus.BAD_REQUEST).body(null);
        }

        // 대상이 있으면 삭제 진행
        articleRepository.delete(target);
        // build() : HTTP 응답의 body가 없는 ResponseEntity 생성
        return ResponseEntity.status(HttpStatus.OK).build();
    }
}
- 테스트를 위해 새 데이터를 추가한다.
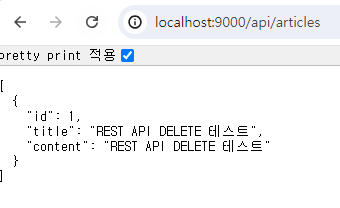
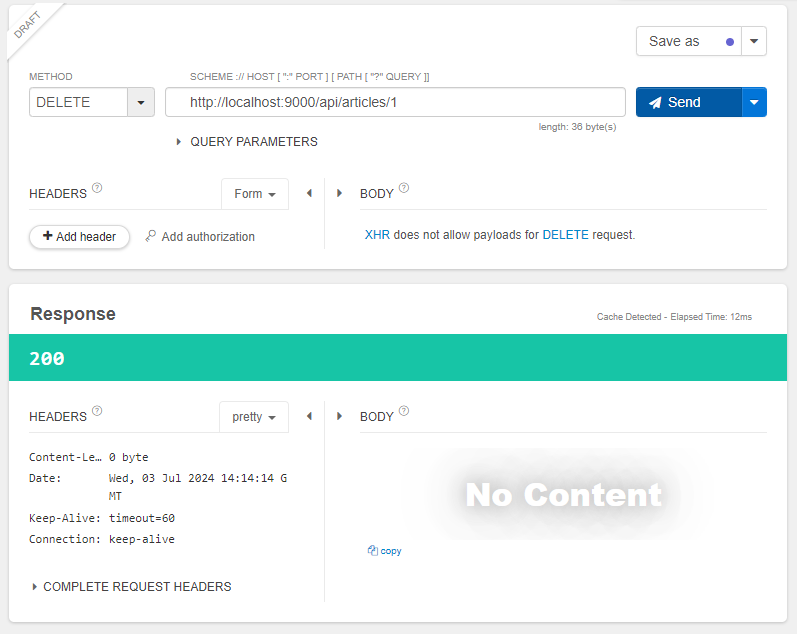
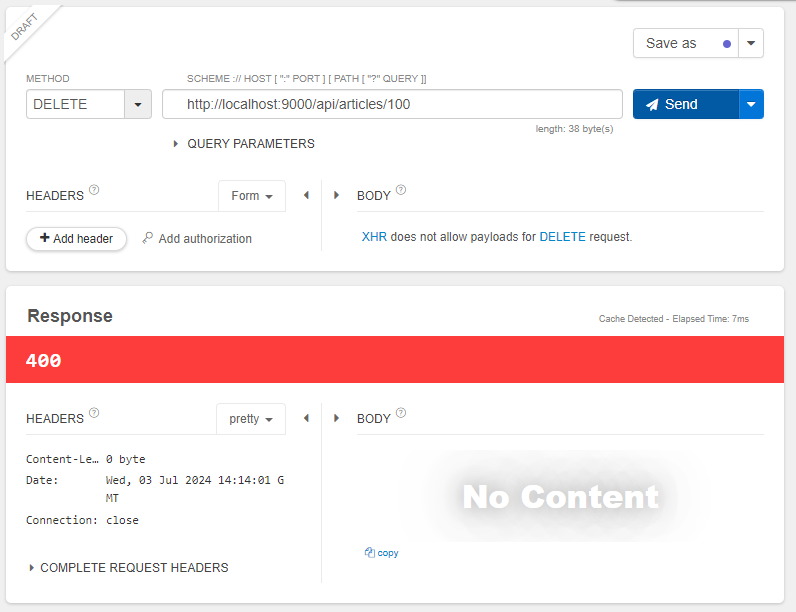
- Talend API Test에서 DELETE 요청으로 DB에 없는
id를 삭제 요청을 보냈다면400응답이 돌아온다.
- 이번엔 방금 추가한 데이터의
id를 삭제 요청하면200응답이 돌아온다.