게시판 만들기
✒️ 2025-05-28 13:14 내용 수정
실습 목표
- JSP, Spring으로 진행했었던 게시판 만들기를 Spring boot로도 만들어본다.
- DB와 연결하여 게시글 내용을 조회, 추가, 수정, 삭제한다.
- JSP 게시판 만들기 (게시판 만들기)와 Spring 게시판 만들기(게시판 만들기) 참고.
- 게시판 테이블에서 ref, step, depth가 존재하는 이유는 일반 글과 답글의 계층구조로 인해 추가되었다. 상세 설명은 JSP 게시판 만들기 참고.
실습 흐름
- DB와 Spring boot를 Mybatis로 연결한다.
- DB에 테이블을 추가한다. 이미 사용하던 테이블이 존재한다면 사용하던 테이블을 연결한다.
- DTO, Mapper 인터페이스, mapper.xml(SQL문), DAO, Service 인터페이스 및 클래스를 만든다.
- Service를 호출할 Controller를 만든다.
- 정보를 표시하고 주고 받을 HTML을 만든다.
- 기능 : 게시글 조회, 추가, 삭제, 로그인, 로그아웃
흐름 내용
- DB -> Mapper -> DAO -> Service -> Controller 순으로 데이터를 거쳐오며, 최종적으로 Controller를 통해 View(HTML)에 정보를 표시한다.
- Spring에서 설계할 때 항상 데이터의 흐름을 잊지 말자.
1. DB 연결 및 테이블 구성
-
DB 연결을 위한 Mybatis 설정을 참고하여 DB 연결에 필요한 MyBatis 설정을 진행한다.
-
Board 테이블과 Member 테이블을 생성한다.
- DB는 Oracle을 사용했다.
- Board 테이블은 Resources/Web/JSP/실습/기초 실습 (2024)/게시판 만들기#DB에 테이블 추가와 같은 테이블이다.
- Member 테이블은 회원가입 사이트 만들기#DB에 테이블 추가와 같은 테이블이다.
--시퀀스
CREATE SEQUENCE SEQ_BOARD_IDX;

--테이블
CREATE TABLE BOARD(
	IDX NUMBER(3) PRIMARY KEY,  --번호
	NAME VARCHAR2(100) NOT NULL, --작성자
	SUBJECT VARCHAR2(255) NOT NULL, --게시글 이름
	CONTENT CLOB,  --게시글 내용
	PWD VARCHAR2(100),  --비밀번호
	IP VARCHAR2(100),  --IP
	REGDATE DATE,  --작성일
	READHIT NUMBER(3) DEFAULT 0, --조회수
	REF INT, --기준글번호(댓글의 메인글 번호)
	STEP INT,  --댓글순서
	DEPTH INT,  --대댓글
	DEL_INFO NUMBER(2)  --글 삭제여부
);


--시퀀스
CREATE SEQUENCE SEQ_MYUSER_IDX;

--테이블
CREATE TABLE MYUSER(
	IDX NUMBER(3) PRIMARY KEY,
	NAME VARCHAR2(100) NOT NULL,
	ID VARCHAR2(100) NOT NULL, UNIQUE,
	PWD VARCHAR2(100) NOT NULL
);
2. util 클래스
- 상수를 저장할 클래스와 내부 클래스를 만든다.
- 한 페이지 당 보여줄 게시물의 수와 페이지 메뉴 수를 저장한다.
package com.example.board.common;

public class Common {

	public static class Board {

		// 한 페이지 당 보여줄 게시물 수
		public final static int BLOCKLIST = 10;

		// 한 화면에 보여지는 페이지 메뉴 수
		public final static int BLOCKPAGE = 5;
	}
}
- 페이지 메뉴를 만들 Paging 클래스를 만든다.
- getPaging() 메소드는 URL, 현재 페이지, 전체 줄 수, 한 페이지 당 보여줄 게시물 수, 페이지 메뉴 수를 매개변수로 받는다.
- JSP와 Spring의 페이지 처리 클래스 및 메소드도 참고.
package com.example.board.util;
public class Paging {
public static String getPaging(String pageURL, int nowPage, int rowTotal, int blockList, int blockPage) {
int totalPage;
int startPage;
int endPage;
boolean isPrevPage, isNextPage;
StringBuffer sb; // HTML에 출력할 태그
isPrevPage = isNextPage = false;
// 전체 페이지 = 전체 줄 수 / 한 페이지에 보여줄 게시물 수
totalPage = rowTotal / blockList;
if (rowTotal % blockList != 0 ) {
totalPage++; // 여분을 담을 페이지까지 포함
}
if (nowPage > totalPage) {
nowPage = totalPage; // 현재 페이지의 초과 방지
}
// 시작 페이지는 blockPage 단위로 증가하도록 설정
startPage = (int)(((nowPage-1)/blockPage) * blockPage + 1);
endPage = startPage + blockPage - 1;
if (endPage > totalPage) {
endPage = totalPage; // 마지막 페이지 초과 방지
}
if (endPage < totalPage) {
isNextPage = true; // 다음 페이지로 넘어갈 수 있음
}
if (startPage > 1) {
isPrevPage = true; // 이전 페이지로 넘어갈 수 있음
}
// 출력할 태그 생성
sb = new StringBuffer();
// i 태그는 fontawesome 사이트의 아이콘을 사용
if(isPrevPage) {
sb.append("<a href='"+pageURL+"?page=");
sb.append(startPage - 1);
sb.append("'><i class=\"fa-solid fa-arrow-left\"></i></a>");
} else {
sb.append("<i class=\"fa-solid fa-arrow-left\"></i>");
}
sb.append(" ");
for(int i = startPage; i <= endPage; i++) {
if(i > totalPage) break;
if(i == nowPage) { // 선택한 페이지 강조 처리
sb.append("<b>"+i+"</b>");
} else {
sb.append("<a href='"+pageURL+"?page=");
sb.append(i);
sb.append("'>"+i+"</a>");
}
}
sb.append(" ");
if(isNextPage) {
sb.append("<a href='"+pageURL+"?page=");
sb.append(endPage);
sb.append("'><i class=\"fa-solid fa-arrow-right\"></i></a>");
} else {
sb.append("<i class=\"fa-solid fa-arrow-right\"></i>");
}
return sb.toString();
}
}
3. DTO와 Mapper 인터페이스, mapper.xml 생성
- src/main/java 폴더의 com.example.tier처럼 group id와 artifact로 된 패키지의 하위 패키지로 dto 패키지와 mapper 패키지를 만든다.
- dto 패키지에 BoardDTO와 MemberDTO를 만든다.
- DB에 Snake 표기법(표기 규칙#4. Snake 표기법)으로 작성하지 않았다면 DTO의 필드들의 이름도 그대로 작성한다.
package com.example.board.dto;

import lombok.Data;

@Data
public class BoardDTO {
	private int idx;
	private int readhit;
	private int ref;
	private int step;
	private int depth;
	private int delInfo;

	private String name;
	private String subject;
	private String content;
	private String pwd;
	private String ip;
	private String regdate;
}
package com.example.board.dto;

import lombok.Data;

@Data
public class MemberDTO {

	private int idx;
	private String name;
	private String id;
	private String pwd;
	private String email;
}
- mapper 패키지에 BoardMapper와 MemberMapper를 인터페이스로 만든다.
- Mapper 클래스에는
@MapperAnnotation을 추가한다. - Board에서 주로 수행할 수 있는 기능은 게시글을 페이지 수만큼 조회하기, 조회수 증가, 글 작성, 답글 작성, 글을 삭제된 것처럼 처리하는 것이다.
- 답글 작성의 경우 게시판 글들의 계층구조로 인해 step 증가 처리를 부가적으로 수행해야 한다.
- Mapper 클래스에는
package com.example.board.mapper;

import java.util.HashMap;
import java.util.List;

import org.apache.ibatis.annotations.Mapper;

import com.example.board.dto.BoardDTO;

@Mapper
public interface BoardMapper {

	// 페이지 게시물 조회
	public List<BoardDTO> selectList(HashMap<String, Integer> map);

	// 전체 게시물 수 조회
	public int getRowTotal();

	// 게시물 1건 조회
	public BoardDTO select(int idx);

	// 조회수 증가
	public int update_readhit(int idx);

	// 글 작성
	public int insert(BoardDTO dto);

	// 삭제된 것처럼 처리
	public int del_update(BoardDTO dto);

	// step 증가
	public int update_step(BoardDTO origin_dto);

	// 답글 추가
	public int reply(BoardDTO dto);
}
package com.example.board.mapper;

import org.apache.ibatis.annotations.Mapper;

import com.example.board.dto.MemberDTO;

@Mapper
public interface MemberMapper {

	// 회원 조회
	public MemberDTO select(String id);

	// 회원 가입
	public int join(MemberDTO dto);
}
- src/main/resources 폴더에 mapper 패키지를 만들고, Mapper 인터페이스와 연결할 mapper.xml(board.xml과 member.xml)의 SQL문을 작성한다.
- query문은 JSP와 Spring에서도 진행한 게시판 만들기의 query문과 동일하다.
- 미리 config.xml 파일에 alias를 등록해둔다.
<?xml version="1.0" encoding="UTF-8"?>

<!DOCTYPE configuration PUBLIC "-//mybatis.org//DTD Config 3.0/EN" "https://mybatis.org/dtd/mybatis-3-config.dtd">
<configuration>
    <typeAliases>
		<typeAlias type="com.example.board.dto.BoardDTO" alias="boardDTO"/>
		<typeAlias type="com.example.board.dto.MemberDTO" alias="MemberDTO"/>
    </typeAliases>
</configuration>
<?xml version="1.0" encoding="UTF-8"?>
<!DOCTYPE mapper PUBLIC "-//mybatis.org//DTD Mapper 3.0//EN" "http://mybatis.org/dtd/mybatis-3-mapper.dtd">
<mapper namespace="com.example.board.mapper.BoardMapper">
	<!-- 페이지 게시물 조회 -->
	<select id="selectList" resultType="boardDTO">
		SELECT * FROM
		(SELECT RANK () OVER (ORDER BY REF DESC, STEP) AS NO, B.* FROM BOARD B)
		WHERE NO BETWEEN #{start} AND #{end}
	</select>

	<!-- 전체 게시물 수 조회 -->
	<select id="getRowTotal" resultType="int">
		SELECT COUNT(*) FROM BOARD
	</select>

	<!-- 게시글 1건 조회 -->
	<select id="select">
		SELECT * FROM BOARD
		WHERE IDX = #{idx}
	</select>

	<!-- 조회수 증가 -->
	<update id="update_readhit">
		UPDATE BOARD
		SET READHIT = READHIT + 1
		WHERE IDX = #{idx}
	</update>

	<!-- 글 작성 -->
	<insert id="insert">
		INSERT INTO BOARD VALUES(
			SEQ_BOARD_IDX.nextVal,
			#{name},
			#{subject},
			#{content},
			#{pwd},
			#{ip},
			SYSDATE,
			0,
			SEQ_BOARD_IDX.currVal,
			0,
			0,
			0
		)
	</insert>

	<!-- 삭제된 것처럼 처리 -->
	<update id="del_update">
		UPDATE BOARD
		SET SUBJECT = #{subject},
			NAME = #{name},
			DEL_INFO = -1
		WHERE IDX = #{idx}
	</update>

	<!-- step 증가 -->
	<update id="update_step">
		UPDATE BOARD
		SET STEP = STEP + 1
		WHERE REF = #{ref} AND STEP > #{step}
	</update>

	<!-- 답글 추가 -->
	<insert id="reply">
		INSERT INTO BOARD VALUES(
			SEQ_BOARD_IDX.nextVal,
			#{name},
			#{subject},
			#{content},
			#{pwd},
			#{ip},
			SYSDATE,
			0,
			#{ref},
			#{step},
			#{depth},
			0
		)
	</insert>
</mapper>
<?xml version="1.0" encoding="UTF-8"?>
<!DOCTYPE mapper PUBLIC "-//mybatis.org//DTD Mapper 3.0//EN" "http://mybatis.org/dtd/mybatis-3-mapper.dtd">
<mapper namespace="com.example.board.mapper.MemberMapper">
	<!-- 회원 조회 -->
	<select id="select">
		SELECT IDX, NAME, ID, PWD, EMAIL FROM MEMBER WHERE id = #{id}
	</select>

	<!-- 회원가입 -->
	<insert id="join">
		INSERT INTO MEMBER VALUES(
			SEQ_MEMBER_IDX.nextVal,
			#{name},
			#{id},
			#{pwd},
			#{email}
		)
	</insert>
</mapper>
4. DAO
- 이제 src/main/java의 하위 dao패키지를 만들어 Mapper 인터페이스를 사용할 BoardDAO와 MemberDAO를 만든다.
- DAO 클래스에는
@RepositoryAnnotation을 추가한다. - DAO는 Mapper 인터페이스를 생성자 주입하고, Mapper 인터페이스의 메소드를 호출한다.
- DAO 클래스에는
package com.example.board.dao;

import java.util.HashMap;
import java.util.List;

import org.springframework.stereotype.Repository;

import com.example.board.dto.BoardDTO;
import com.example.board.mapper.BoardMapper;

import lombok.RequiredArgsConstructor;

@Repository
@RequiredArgsConstructor
public class BoardDAO {

	private final BoardMapper boardMapper;

	// 페이지별 게시물 조회
	public List<BoardDTO> selectList(HashMap<String, Integer> map) {
		return boardMapper.selectList(map);
	}

	// 전체 게시글 수 조회
	public int getRowTotal() {
		return boardMapper.getRowTotal();
	}

	// 게시글 1건 조회
	public BoardDTO select(int idx) {
		return boardMapper.select(idx);
	}

	// 조회수 증가
	public int update_readhit(int idx) {
		return boardMapper.update_readhit(idx);
	}

	// 새 글 작성
	public int insert(BoardDTO dto) {
		return boardMapper.insert(dto);
	}

	// 삭제된 것처럼 처리
	public int del_update(BoardDTO origin_dto) {
		return boardMapper.del_update(origin_dto);
	}

	// step 증가
	public int update_step(BoardDTO dto) {
		return boardMapper.update_step(dto);
	}

	// 답글 추가
	public int reply(BoardDTO dto) {
		return boardMapper.reply(dto);
	}
}
package com.example.board.dao;

import org.springframework.stereotype.Repository;

import com.example.board.dto.MemberDTO;
import com.example.board.mapper.MemberMapper;

import lombok.RequiredArgsConstructor;

@Repository
@RequiredArgsConstructor
public class MemberDAO {

	private final MemberMapper memberMapper;

	// 회원 조회
	public MemberDTO select(String id) {
		return memberMapper.select(id);
	}

	// 회원 가입
	public int join(MemberDTO dto) {
		return memberMapper.join(dto);
	}
}
5. Controller
- src/main/java의 하위 패키지로 controller 패키지를 만들고, BoardController와 MemberController 클래스를 만든다.
- Controller 클래스는
@ControllerAnnotation과@RequestMapping("/상위경로")Annotation(선택사항)을 추가한다.
- Controller 클래스는
- 이번 게시판 실습에서는 Service를 추가하지 않고 Controller에서 바로 DAO를 주입받아 사용하는 것으로 만들었다.
- 만약 DAO를 한 번에 여러 개를 호출해서 DB에 여러 번 접속하는 동작이 있다면 Service를 만들어서 Service에서 DB 접속을 처리하고, Controller에서는 Service를 한 번만 호출해서 모든 동작을 수행하도록 만드는 것이 좋다.
- HTML 파일을 return할 때 template 하위의 폴더에 만들었다면 폴더까지 써줘야 한다.
@ModelAttribute("name"): Model model로model.addAttribute("name", value)를 한 것과 동일하게 model에 name이란 key에 value를 저장한다.
package com.example.board.controller;

import java.util.HashMap;
import java.util.List;
import java.util.Map;

import org.springframework.beans.factory.annotation.Autowired;
import org.springframework.stereotype.Controller;
import org.springframework.ui.Model;
import org.springframework.web.bind.annotation.GetMapping;
import org.springframework.web.bind.annotation.ModelAttribute;
import org.springframework.web.bind.annotation.PathVariable;
import org.springframework.web.bind.annotation.PostMapping;
import org.springframework.web.bind.annotation.RequestBody;
import org.springframework.web.bind.annotation.RequestMapping;
import org.springframework.web.bind.annotation.RequestParam;
import org.springframework.web.bind.annotation.ResponseBody;
import org.springframework.web.servlet.view.RedirectView;

import com.example.board.common.Common;
import com.example.board.common.Common.Board;
import com.example.board.dao.BoardDAO;
import com.example.board.dao.MemberDAO;
import com.example.board.dto.BoardDTO;
import com.example.board.dto.MemberDTO;
import com.example.board.util.Paging;
import com.fasterxml.jackson.core.type.TypeReference;
import com.fasterxml.jackson.databind.ObjectMapper;

import jakarta.servlet.http.HttpServletRequest;
import lombok.RequiredArgsConstructor;

@Controller
@RequiredArgsConstructor
@RequestMapping("/board/*")
public class BoardController {

	// DAO를 바로 주입 받아서 사용했다
	private final BoardDAO boardDAO;
	private final MemberDAO memberDAO;

	// HttpServlertRequest를 필드 주입받아 사용
	@Autowired
	private HttpServletRequest request;

	// 페이지별 게시글 목록 조회
	@GetMapping(value={"/", "board_list"})
	public String list(Model model, @RequestParam(required=false, defaultValue="1") int page) {
		// 페이지 설정 -> 조회 시 해당 범위의 게시물을 가져옴
		int start = (page - 1) * Common.Board.BLOCKLIST + 1;
		int end = start + Common.Board.BLOCKLIST -1;

		HashMap<String, Integer> map = new HashMap<>();
		map.put("start", start);
		map.put("end", end);

		// 전체 게시글 수 조회
		int rowTotal = boardDAO.getRowTotal();

		// 페이지 메뉴 생성(태그)
		String pageMenu = Paging.getPaging("board_list", page, rowTotal, Board.BLOCKLIST, Board.BLOCKPAGE);

		// 페이지별 게시물 조회
		List<BoardDTO> list = boardDAO.selectList(map);

		// 조회수 관련 session 정보 제거 -> 한 게시글에서 F5로 조회수 증가 방지용
		request.getSession().removeAttribute("show");

		// 데이터 포워딩
		model.addAttribute("list", list);
		model.addAttribute("pageMenu", pageMenu);

		return "/board/board_list";
	}

	// 게시글 상세 보기
	@GetMapping("view")
	public String view(Model model, @RequestParam(defaultValue="1") int page, int idx) {

		// 게시물 1건 조회
		BoardDTO dto = boardDAO.select(idx);

		// 조회수 1회 업로드용 세션 속성 추가
		String show = (String)request.getSession().getAttribute("show");

		if(show == null) { // 조회수 속성이 없을 경우 조회수 올리고 속성 추가
			int res = boardDAO.update_readhit(idx);
			request.getSession().setAttribute("show", "0");
		}

		// 데이터 포워딩
		model.addAttribute("dto", dto);

		return "board/board_view";
	}

	// 글 작성 페이지로 이동
	@GetMapping("insert_form")
	public String insert_form(Model model, @RequestParam(required=false, defaultValue="1") int page) {
		// 미리 form에 dto 전달해서 넣어놓기
		model.addAttribute("dto", new BoardDTO());
		return "board/insert_form";
	}

	// 글 작성
	@PostMapping("insert")
	public RedirectView insert(BoardDTO dto) { // form으로부터 온 데이터는 자동으로 dto에 담김
		// ip 등록
		String ip = request.getRemoteAddr();
		dto.setIp(ip);

		// 글 추가
		int res = boardDAO.insert(dto);

		return new RedirectView("/board/board_list");

	}

	// 글 삭제된 것처럼 처리
	@PostMapping("del")
	@ResponseBody // ajax를 위한 결과 전송
	public String del(@RequestBody String body) { // POST 요청 시 RequestBody에 데이터가 담겨온다

		// ObjectMapper : Java 객체와 JSON 데이터 간의 변환을 수행할 때 사용한다
		// JSON을 읽고 쓰는 함수 제공하고, Java 객체를 JSON으로 직렬화하거나, JSON을 Java객체로 역직렬화 해준다.
		ObjectMapper om = new ObjectMapper();

		// 변환시킬 JSON 데이터를 저장할 Map
		Map<String, String> data = null;

		try {
			// JSON 문자열이나 데이터를 Java 객체로 변환
			// JSON의 정보를 Map에 저장
			data = om.readValue(body, new TypeReference<Map<String, String>>() {});
		} catch (Exception e) {
		}

		// Map에서 idx를 가져온다
		int intIdx = Integer.parseInt(data.get("idx"));

		// 삭제 처리할 dto를 조회
		BoardDTO dto = boardDAO.select(intIdx);

		dto.setSubject("deleted"); // 삭제 처리
		dto.setName("unknown"); // 삭제 처리

		// DB에 삭제 처리
		int res = boardDAO.del_update(dto);

		if(res > 0) {
			return "{\"param\":\"success\"}";
		}

		return "{\"param\":\"fail\"}";
	}

	// 답변 작성 페이지로 이동
	@GetMapping("reply_form")
	public String reply_form(Model model, @RequestParam(required=false, defaultValue="1") int page, int idx) {
		// form에 미리 dto 넣어두기
		model.addAttribute("dto", new BoardDTO());

		return "board/reply_form";
	}

	// 답변 작성
	@PostMapping("reply/{idx}") // 이번엔 @PathVariable을 사용해봤다
	public RedirectView reply(BoardDTO dto, @PathVariable("idx") int idx, @RequestParam(defaultValue="1") int page) {
		// ip 설정
		dto.setIp(request.getRemoteAddr());

		// 원본 게시글 정보 조회
		BoardDTO origin_dto = boardDAO.select(idx);

		// 기준글에 step 이상값은 step = step + 1 처리
		int res = boardDAO.update_step(origin_dto);

		// 답글의 ref, depth, step 설정
		dto.setRef(origin_dto.getRef());
		dto.setStep(origin_dto.getStep()+1);
		dto.setDepth(origin_dto.getDepth()+1);

		// 답글 작성
		int res2 = boardDAO.reply(dto);

		return new RedirectView("/board/board_list?page="+page);
	}

	// 로그인 페이지로 이동
	@GetMapping("login_form")
	public String login_form(@ModelAttribute("dto") MemberDTO dto) { // model에 "dto"라는 key의 value를 MemberDTO dto로 설정

		return "board/login_form";
	}

	// 로그인
	@GetMapping("login")
	@ResponseBody
	public String login(String id, String pwd) {
		// id 확인용
		System.out.println("id : " + id + " | pwd : " + pwd);

		// DB에 id 조회
		MemberDTO dto = memberDAO.select(id);

		if(dto == null || !dto.getPwd().equals(pwd)) { // id가 없거나 비밀번호가 일치하지 않을 때
			return "{\"result\":\"no\"}";
		}

		// 로그인 처리로 세션에 id를 저장
		request.getSession().setAttribute("id", dto);

		return "{\"result\":\"yes\"}";
	}

	// 로그아웃
	@GetMapping("logout")
	public RedirectView logout() {
		// 세션에서 id를 제거한다.
		request.getSession().removeAttribute("id");
		return new RedirectView("/board/board_list");
	}

	// 회원가입 페이지로 이동
	@GetMapping("join_form")
	public String join_form(@ModelAttribute("dto") MemberDTO dto) { // Annotation을 사용하면 더 간결해진다.
		return "board/join_form";
	}

	// 아이디 중복 검사
	@GetMapping("id_check")
	@ResponseBody
	public String id_check(String id) {
		// 전달 받은 id가 DB에 존재하는지 조회
		MemberDTO dto = memberDAO.select(id);

		if(dto != null) {
			return "{\"result\":\"no\"}";
		}

		return "{\"result\":\"yes\"}";
	}

	// 회원가입
	@PostMapping("join")
	public RedirectView join(MemberDTO dto) {
		int res = memberDAO.join(dto);

		if (res > 0) {
			return new RedirectView("/board/login_form");
		}

		return new RedirectView("/board/join_form");
	}
}
- login Mapping에서 Get대신 Post를 사용한다면 아래처럼 @RequsetBody로 데이터를 받아야 한다.
- HTML에서 ajax로 데이터를 전송할 때도
data : JSON.stringify({'id':id, 'pwd':pwd})로 작성해야 한다.
- HTML에서 ajax로 데이터를 전송할 때도
 //post 형식으로 사용 시
@PostMapping("login") // Mapping을 Post로 변경
@ResponseBody public String login(@RequestBody String body) {
	// Java <-> JSON 변환 객체
	ObjectMapper om = new ObjectMapper();
	// 데이터를 저장할 Map 인스턴스
	Map<String, String> data = null;

	try {
		// JSON 데이터를 Map에 저장
		data = om.readValue(body, new TypeReference<Map<String, String>>() {});
	} catch (Exception e) { }

	// id와 pwd를 변수에 저장
	String id = data.get("id");
	String pwd = data.get("pwd");

	// 해당 id가 DB에 존재하는지 조회
	MemberDTO dto = memberDAO.select(id);

	if(dto == null || !dto.getPwd().equals(pwd)) { // id가 없거나 비밀번호가 틀렸을 때
		return "[\"result\":\"no\"]";
	}
	// 로그인 처리로 세션에 id 저장
	request.getSession().setAttribute("id", dto);

	return "[\"result\":\"yes\"]";
}
6. HTML, CSS, JS
- 이제 src/main/resources/templates 패키지 하위에 product 폴더와 order 폴더를 만들고, 정보를 주고받을 HTML을 만든다.
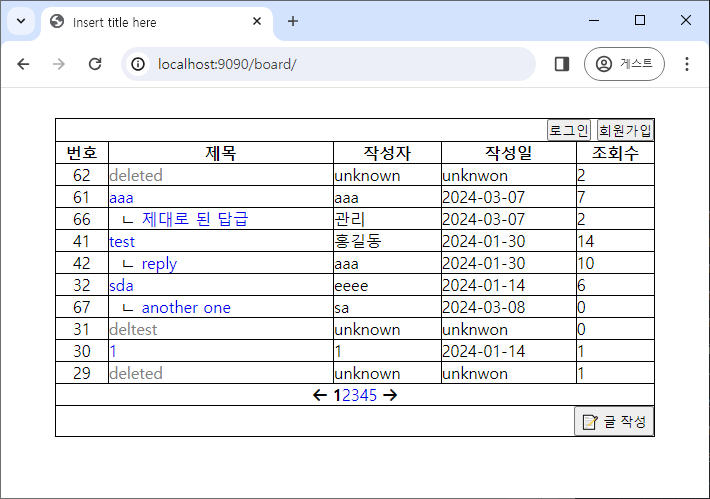
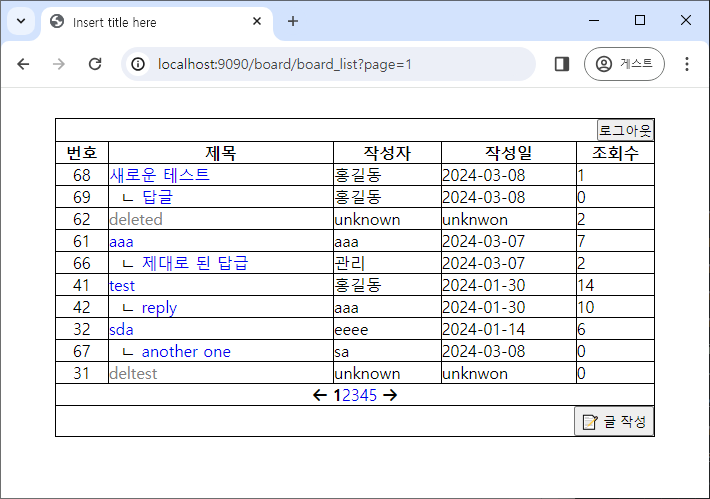
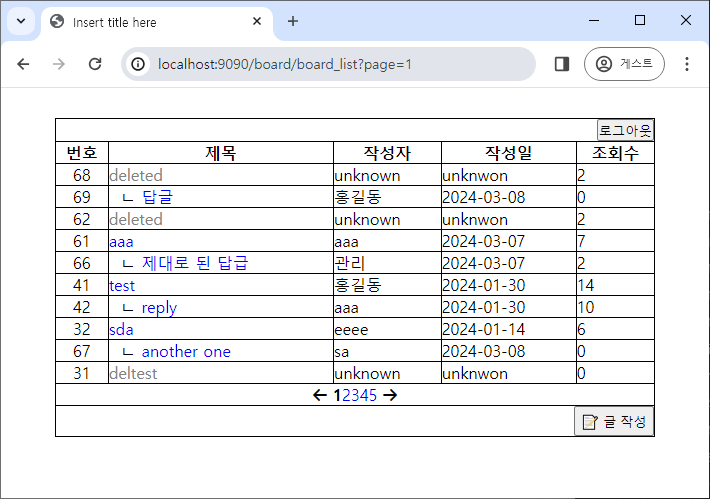
- board_list.html : 페이지별 게시물 조회, 로그인, 회원가입, 로그아웃
<!-- board_list.html -->
<!DOCTYPE html>
<html lang="en" xmlns:th="http://www.thymeleaf.org">
<head>
<meta charset="UTF-8">
<title>Insert title here</title>
<script src="https://kit.fontawesome.com/75c3a9ae5d.js" crossorigin="anonymous"></script>
<link rel="stylesheet" th:href="@{/board.css}">
</head>
<body>
<div class="container">
<table>
<tr>
<td colspan="5" align="right">
<th:block th:if="${session.id == null}">
<input type="button" value="로그인" name="login_form">
<input type="button" value="회원가입" name="join">
</th:block>
<th:block th:unless="${session.id == null}">
<input type="button" value="로그아웃" name="logout">
</th:block>
</td>
</tr>
<tr>
<th>번호</th>
<th>제목</th>
<th>작성자</th>
<th>작성일</th>
<th>조회수</th>
</tr>
<th:block th:each="dto:${list}">
<tr th:object="${dto}">
<td align="center" th:text="*{idx}"></td>
<td>
<!-- 게시글 제목 표시 -->
<!-- 답글일 경우엔 들여쓰기와 기호를 추가 -->
<th:block th:if="*{depth > 0}">
<!-- #numbers 유틸리티 객체를 사용해서 1부터 depth까지 1씩 증가하는 sequence를 만들어
th:each에 적용하여 for문의 기능을 구현한다.
${#numbers.sequence(1, dto.depth)}으로 작성해도 작동한다.
-->
<span th:each="depth : *{#numbers.sequence(1, depth)}"> </span>
</th:block>
<th:block th:if="*{depth != 0}">ㄴ</th:block>
<th:block th:if="*{delInfo != -1}">
<!-- a태그 사용 시 mapping을 잡아주려면 th:href를 사용해 잡아줘야 한다. -->
<a th:href="@{/board/view(idx=*{idx}, page=${param.page})}" th:text="*{subject}"></a>
</th:block>
<!-- 삭제된 글이라면 클릭 불가 -->
<th:block th:if="*{delInfo == -1}">
<font color="gray" th:text="*{subject}"></font>
</th:block>
</td>
<!-- 게시글 작성자 표시도 삭제 여부에 따라 다르게 표시함 -->
<td th:if="*{delInfo != -1}" th:text="*{name}"></td>
<td th:unless="*{delInfo != -1}" th:text="unknown"></td>
<!-- 게시글 작성일 표시도 삭제 여부에 따라 다르게 표시함 -->
<!-- #strings 유틸리티 객체의 substring 메소드를 사용해서
date 객체의 시간 부분을 제거하고 날짜만 표시
-->
<td th:if="*{delInfo != -1}" th:text="*{#strings.substring(regdate, 0, 10)}">
<td th:unless="*{delInfo != -1}" th:text="unknwon">
<td th:text="*{readhit}"></td>
</tr>
</th:block>
<tr>
<td colspan="5" align="center">
<!-- Paging 클래스에서 getPaging() 메소드를 사용해서
만든 페이지 메뉴를 id="pageMenu"인 div에 추가
-->
<div id="pageMenu"></div>
</td>
</tr>
<tr>
<td colspan="5" align="right">
<!-- button에 onclick을 property로 바로 적용 시
thymeleaf 표현식을 사용해서 location.href를 작성할 수 있다.
문자열로 표시해야 하기 때문에 ${}도 같이 사용하려면 "|" 기호를 사용해야 한다.
-->
<button type="button" th:onclick="|location.href='@{/board/insert_form(page=${param.page})}'|">📝 글 작성</button>
</td>
</tr>
</table>
</div>
<!-- jquery 사용 -->
<script src="https://code.jquery.com/jquery-3.6.4.min.js"></script>
<script th:inline="javascript">
// controller에서 포워딩한 데이터 가져오기
let pageMenu = [[${pageMenu}]];
// 로그인 액션 추가
let $loginFormButton = $("input[name='login_form']");
$loginFormButton.on("click", function() {
window.location.href = '/board/login_form';
})
// 회원가입 액션 추가
let $joinFormButton = $("input[name='join']");
$joinFormButton.on("click", function() {
window.location.href = '/board/join_form';
})
// 로그아웃 액션 추가
let $logoutButton = $("input[name='logout']");
$logoutButton.on("click", function() {
window.location.href = '/board/logout';
})
// id=pageMenu인 div에 넣기
$("#pageMenu").html(pageMenu);
</script>
</body>
</html>
- board_view.html : 게시글 상세보기
<!-- board_view.html -->
<!DOCTYPE html>
<html lang="en" xmlns:th="http://www.thymeleaf.org">
<head>
<meta charset="UTF-8">
<title>Insert title here</title>
<link rel="stylesheet" th:href="@{/board.css}">
</head>
<body>
	<div class="container">
		<table th:object="${dto}">
			<caption>::게시글 상세보기</caption>
			<tr>
				<th>제목</th>
				<td th:text="*{subject}"></td>
			</tr>
			<tr>
				<th>작성자</th>
				<td th:text="*{name}"></td>
			</tr>
			<tr>
				<th>작성일</th>
				<td th:text="*{regdate}"></td>
			</tr>
			<tr>
				<th>ip</th>
				<td th:text="*{ip}"></td>
			</tr>
			<tr>
				<th>내용</th>
				<td width="500px" height="200px" th:text="*{content}"></td>
			</tr>
			<tr>
				<th>비밀번호</th>
				<td><input type="password" id="c_pwd"></td>
			</tr>
			<tr>
				<td colspan="2" align="right">
					<!-- button에 onclick을 property로 바로 적용 시
						thymeleaf 표현식을 사용해서 location.href를 작성할 수 있다.
						문자열로 표시해야 하기 때문에 ${}도 같이 사용하려면 "|" 기호를 사용해야 한다.
					-->
					<button type="button" th:onclick="|location.href='@{/board/board_list(page=${param.page})}'|" th:text="뒤로가기"></button>

					<!-- 답글 -->
					<th:block th:if="*{depth lt 1}">
						<!-- window키+"."으로 작성한 이모티콘은 th:value에 작성시 에러가 발생했다. -->
						<button type="button" id="reply-btn">✏답글</button>
					</th:block>

				 	<button type="button" id="del-btn">글 삭제</button>
				</td>
			</tr>
		</table>
	</div>

	<!-- jquery 사용 -->
	<script src="https://code.jquery.com/jquery-3.6.4.min.js"></script>
	<script th:inline="javascript">
		// inline 작성 시 세미콜론을 쓰면 '' 내용으로 인식함
		let idx=  /*[[${dto.idx}]]*/''
		let pwd =  /*[[${dto.pwd}]]*/''
		let page =  /*[[${param.page}]]*/''

		$("#del-btn").on("click", function() {
			if(!confirm("정말 삭제하시겠습니까?")) {
				return;
			}

			let $c_pwd = $("input[type='password']").val();

			if($c_pwd != pwd) { // 비밀번호가 일치할 때만 삭제 진행
				alert("비밀번호가 일치하지 않습니다");
				return;
			}

			// ajax
			$.ajax({
				url : "/board/del",
				type : "POST",
				data : JSON.stringify({'idx':idx}), // POST로 요청 시 data는 JSON.stringigy()로 전송해야 한다.
				dataType : "json",
				contentType : "application/json; charset=utf-8",
				success: function(data) {
					if(data["param"]) { // @ResponseBody의 내용으로 결과 확인
						alert("성공적으로 삭제했습니다");
						window.location.href="/board/board_list?page="+page;
					}
				}
			});
		});

		$("#reply-btn").on("click", function() {
			location.href = "/board/reply_form?idx="+idx+"&page="+page;
		});

	</script>
</body>
</html>
- insert_form.html : 게시글 작성하기
<!-- insert_form.html -->
<!DOCTYPE html>
<html lang="en" xmlns:th="http://www.thymeleaf.org">
<head>
<meta charset="UTF-8">
<title>Insert title here</title>
	<link rel="stylesheet" th:href="@{/board.css}">
</head>
<body>
	<div class="container">
		<!-- form을 submit하는 경우라면 form에 action, method 지정 시 자동으로 데이터를 담아 전송해준다. -->
		<form th:action="@{/board/insert}" name="f" th:object="${dto}" method="post">
			<input type="hidden" name="page" th:value="${param.page}">
			<table>
				<caption>:: 새 글 작성 ::</caption>
				<tr>
					<th>제목</th>
					<td><input th:field="*{subject}"></td>
				</tr>
				<tr>
					<th>작성자</th>
					<td><input th:field="*{name}"></td>
				</tr>
				<tr>
					<th>내용</th>
					<td><textarea th:field="*{content}" rows="10" cols="50" style="resize:none;"></textarea></td>
				</tr>
				<tr>
					<th>비밀번호</th>
					<td><input th:field="*{pwd}" type="password"></td>
				</tr>
				<tr>
					<td colspan="2" align="right">
						<!-- input 태그의 type="submit"을 사용해도 상관없다. -->
						<button type="button" id="send_check">📝 글 작성</button>
						<button type="button" th:onclick="|location.href='@{/board/board_list(page=${param.page})}'|">취소</button>
					</td>
				</tr>
			</table>
		</form>
	</div>

	<!-- jquery 사용 -->
	<script src="https://code.jquery.com/jquery-3.6.4.min.js"></script>
	<script th:inline="javascript">

		const $sendBtn = $("#send_check");

		$sendBtn.on("click", function() {
			$("form[name='f']").submit(); // form 제출
		});

	</script>
</body>
</html>
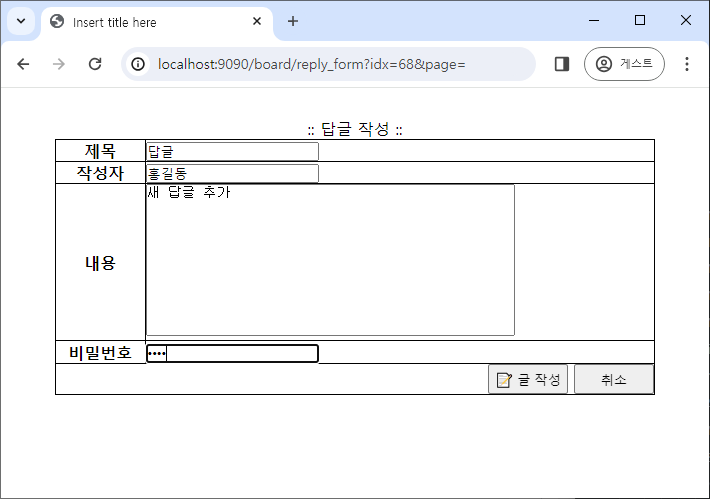
- reply_form.html : 답글 작성
<!-- reply_form.html -->
<!DOCTYPE html>
<html lang="en" xmlns:th="http://www.thymeleaf.org">
<head>
<meta charset="UTF-8">
<title>Insert title here</title>
	<link rel="stylesheet" th:href="@{/board.css}">
</head>
<body>
	<div class="container">
		<!-- 게시글 작성과 동일 -->
		<form th:action="@{/board/reply/{idx}(idx=${param.idx})}" name="f" th:object="${dto}" method="post">
			<input type="hidden" name="page" th:value="${param.page}">
			<table>
				<caption>:: 답글 작성 ::</caption>
				<tr>
					<th>제목</th>
					<td><input th:field="*{subject}"></td>
				</tr>
				<tr>
					<th>작성자</th>
					<td><input th:field="*{name}"></td>
				</tr>
				<tr>
					<th>내용</th>
					<td><textarea th:field="*{content}" rows="10" cols="50" style="resize:none;"></textarea></td>
				</tr>
				<tr>
					<th>비밀번호</th>
					<td><input th:field="*{pwd}" type="password"></td>
				</tr>
				<tr>
					<td colspan="2" align="right">
						<button type="button" id="send_check">📝 글 작성</button>
						<button type="button" th:onclick="|location.href='@{/board/view(idx=${param.idx}, page=${param.page})}'|">취소</button>
					</td>
				</tr>
			</table>
		</form>
	</div>

	<!-- jquery 사용 -->
	<script src="https://code.jquery.com/jquery-3.6.4.min.js"></script>
	<script th:inline="javascript">

		const $sendBtn = $("#send_check");

		$sendBtn.on("click", function() {
			$("form[name='f']").submit();
		});

	</script>
</body>
</html>
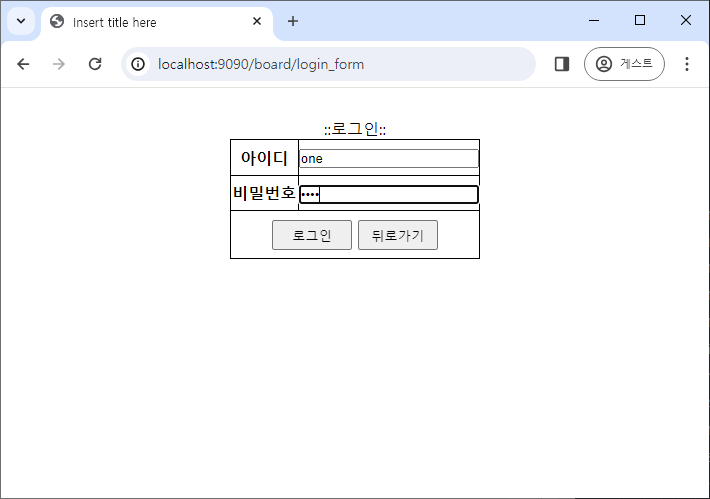
- login_form.html : 로그인
<!-- login_form.html -->
<!DOCTYPE html>
<html lang="en" xmlns:th="http://www.thymeleaf.org">
<head>
<meta charset="UTF-8">
<title>Insert title here</title>
	<link rel="stylesheet" th:href="@{/board.css}">
</head>
<body>
	<div class="container login">
		<!-- method를 get으로 할 때와 post 할 때 ajax로 보내는 data 처리가 약간 다르다 -->
		<form th:action="@{/board/login}" th:object="${dto}" method="GET">
			<table>
				<caption>::로그인::</caption>
				<tr>
					<th>아이디</th>
					<td><input th:field="*{id}"></td>
				</tr>
				<tr>
					<th>비밀번호</th>
					<td><input th:field="*{pwd}" type="password"></td>
				</tr>
				<tr>
					<td colspan="2" align="center">
						<button type="button" name="login">로그인</button>
						<button type="button" th:onclick="|location.href='@{/board/board_list}'|">뒤로가기</button>
					</td>
				</tr>
			</table>
		</form>
	</div>

	<!-- jquery 사용 -->
	<script src="https://code.jquery.com/jquery-3.6.4.min.js"></script>
	<!-- js파일 참고 -->
	<script th:src="@{/login.js}"></script>
</body>
</html>
- login.js : 로그인의 javascript
- script 파일도 HTML에 적용 시 JS파일도 src/main/resources/static에 만들고,
<script th:src="@{/filename.js}"></script>으로 thymeleaf 표현식을 사용해 경로를 줘야 한다.
- script 파일도 HTML에 적용 시 JS파일도 src/main/resources/static에 만들고,
// name이 login인 버튼
const $loginBtn = $("button[name='login']");
$loginBtn.on("click", function() { // click 액션 추가
// input 태그의 경우 onclick action 외부에서 미리 요소를 가져오면
// 가져올 때의 값을 그대로 인식하므로
// 값이 변경될 때 확인하는 식으로 동작하려면 function 내에서 요소를 가져와서 변수에 저장해야 함
let $id = $("input[name='id']").val();
let $pwd = $("input[name='pwd']").val();
// 유효성 검사
if ($id == '') {
alert("아이디를 입력해주세요");
return;
}
if ($pwd == '') {
alert("비밀번호를 입력해주세요");
return;
}
// ajax
$.ajax({
url : "/board/login",
type : "GET",
data : {'id':$id, 'pwd':$pwd},
// post 형식이라면 JSON.stringify({'id':$id, 'pwd':$pwd})로 전송
// get 형식이라면 객체 형식으로 바로 전달 가능
dataType : "json",
contentType : "application/json; charset=utf-8",
success : function(data) {
if(data["result"] == "no") {
alert("아이디나 비밀번호를 다시 확인해주세요");
return;
} else {
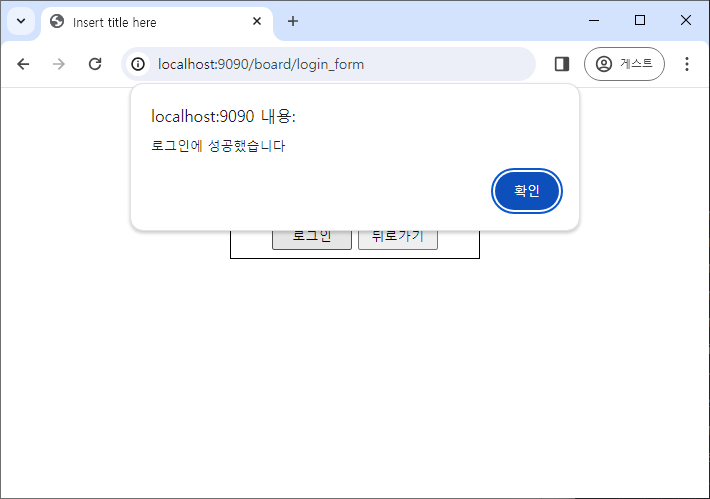
alert("로그인에 성공했습니다");
window.location.href = "/board/board_list";
}
}
});
});
- join_form.html : 회원가입
<!-- join_form -->
<!DOCTYPE html>
<html lang="en" xmlns:th="http://www.thymeleaf.org">
<head>
<meta charset="UTF-8">
<title>Insert title here</title>
<link rel="stylesheet" th:href="@{/board.css}">
</head>
<body>
<div class="container">
<form th:action="@{/board/join}" name="f" th:object="${dto}" method="POST">
<table>
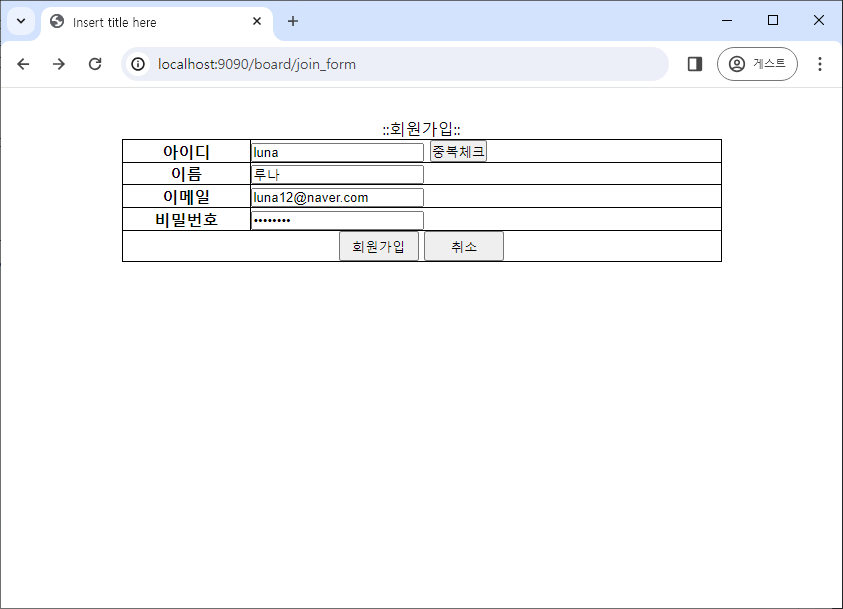
<caption>::회원가입::</caption>
<tr>
<th>아이디</th>
<td>
<input th:field="*{id}">
<input type="button" id="id-check" value="중복체크">
</td>
</tr>
<tr>
<th>이름</th>
<td><input th:field="*{name}"></td>
</tr>
<tr>
<th>이메일</th>
<td><input th:field="*{email}"></td>
</tr>
<tr>
<th>비밀번호</th>
<td><input th:field="*{pwd}" type="password"></td>
</tr>
<tr>
<td colspan="2" align="center">
<button type="button" name="join">회원가입</button>
<button type="button" th:onclick="|location.href='@{/board/board_list}'|">취소</button>
</td>
</tr>
</table>
</form>
</div>
<!-- jquery 사용 -->
<script src="https://code.jquery.com/jquery-3.6.4.min.js"></script>
<script th:src="@{/join.js}"></script>
</body>
</html>
- join.js : 회원가입의 javascript
- src/main/resources/static에 만들고,
<script th:src="@{/filename.js}"></script>으로 thymeleaf 표현식을 사용해 경로를 줘야 한다. - 유효성 검사는 비어있는 값만 안 들어오도록 간략하게만 작성했다.
- src/main/resources/static에 만들고,
const $joinBtn = $("button[name='join']");
const $checkBtn = $("input#id-check");
let $form = $("form[name='f']");
let idCheck = false;
// id 입력이 바뀌면 중복체크 안한 것으로 변경
$("input[name='id']").on("change", function() {
idCheck = false;
});
// 중복체크
$checkBtn.on("click", function() {
let $id = $("input[name='id']").val();
if($id == '') {
alert("아이디를 입력해주세요");
return;
}
$.ajax({
url : "/board/id_check",
type : "GET",
data : {'id' : $id},
dataType : 'json',
contetnType : "application/json; charset=utf-8",
success : function(data) {
if(data['result'] == 'no') {
alert("중복된 아이디입니다.");
return;
} else {
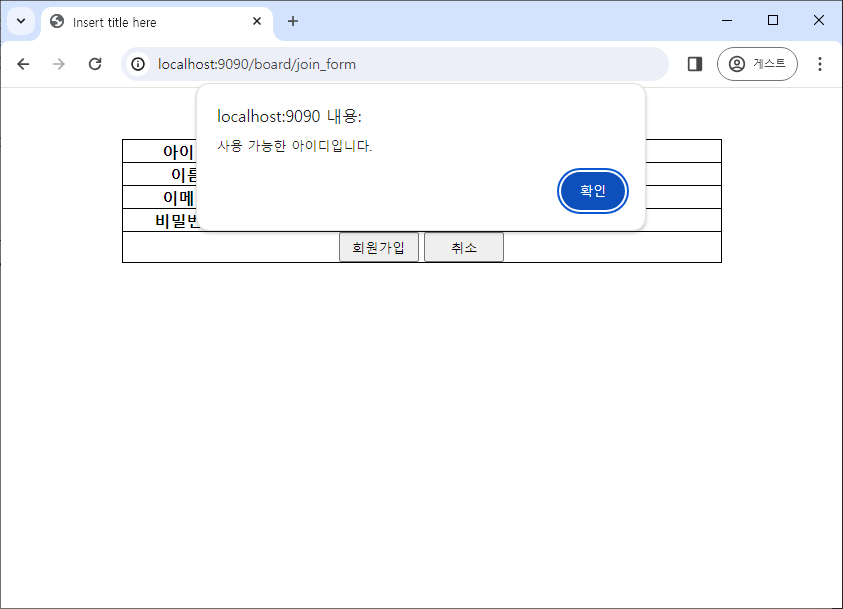
alert("사용 가능한 아이디입니다.");
idCheck = true;
}
}
})
});
$joinBtn.on("click", function() {
if(!idCheck) {
alert("아이디 중복 체크를 해주세요");
return;
}
if($("input[name='name']").val() == '') {
alert("이름를 입력하세요");
return;
}
if($("input[name='email']").val() == '') {
alert("이메일을 입력하세요");
return;
}
if($("input[name='pwd']").val() == '') {
alert("비밀번호를 입력하세요");
return;
}
$form.submit();
})
- 간단한 CSS도 만들어서 적용한다.
- HTML에 CSS를 적용할 때 CSS 파일은 src/main/resources/static에 만들고,
<link rel="stylesheet" th:href="@{/filename.css}">으로, thymeleaf 표현식으로 경로를 줘야 한다.
- HTML에 CSS를 적용할 때 CSS 파일은 src/main/resources/static에 만들고,
@charset "UTF-8";

*{margin:0; padding:0; box-sizing: border-box;}
ul, ol, li{list-style: none;}
a{text-decoration: none;}

.container{
	margin-top:30px;
	width:100%;
	display:flex; justify-content:center;
}

table{
	width:600px;
	border:1px solid black; border-collapse:collapse;
}
tr, th, td{border:1px solid black;}

button{width:80px; height:30px;}

.container.login table{ width: 250px; height: 120px;}
.container.login table input{ width: 100%; }
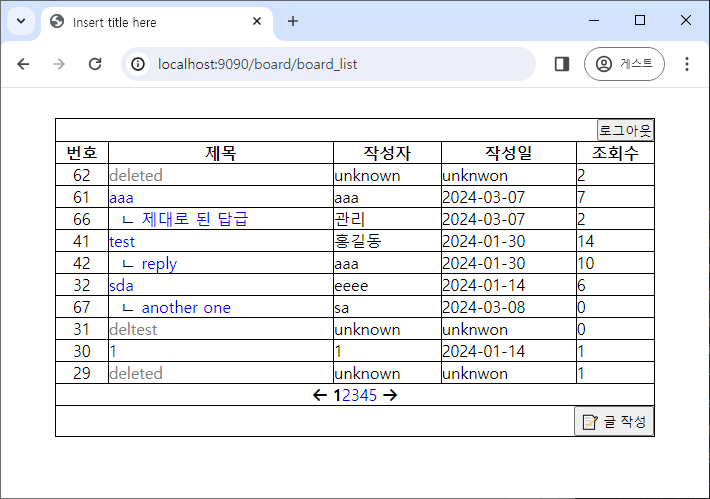
- 첫 화면에서 로그인을 안 한 상태이므로 로그인, 회원가입 버튼이 뜬다.
- DB에 있는 계정으로 접속하면 로그인이 된다.
- 로그인이 되면 로그아웃 버튼으로 바뀌며, 로그아웃을 누르면 세션에 id가 제거되 다시 로그인, 회원가입 버튼이 뜬다.
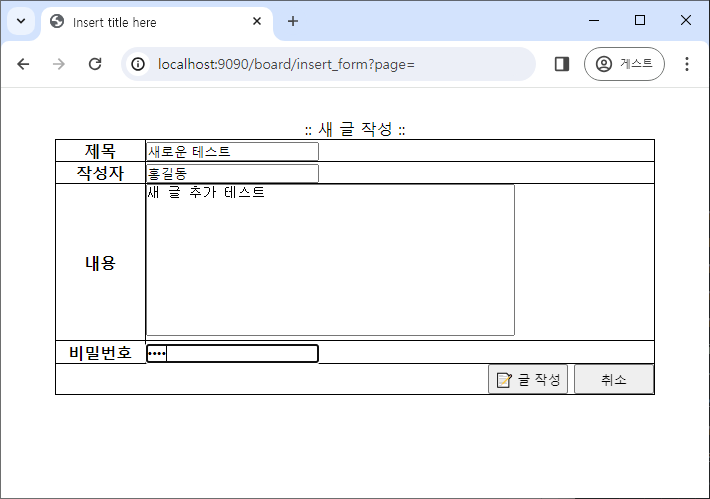
- 새 글을 추가한다.
- page 값이 전에는 넘어오다가 잘 안 넘어왔는데, 이 문제는 Controller에서
model.addAttribute("page", page)를 추가해서 HTML에도 바꿔주면 해결된다.
- page 값이 전에는 넘어오다가 잘 안 넘어왔는데, 이 문제는 Controller에서

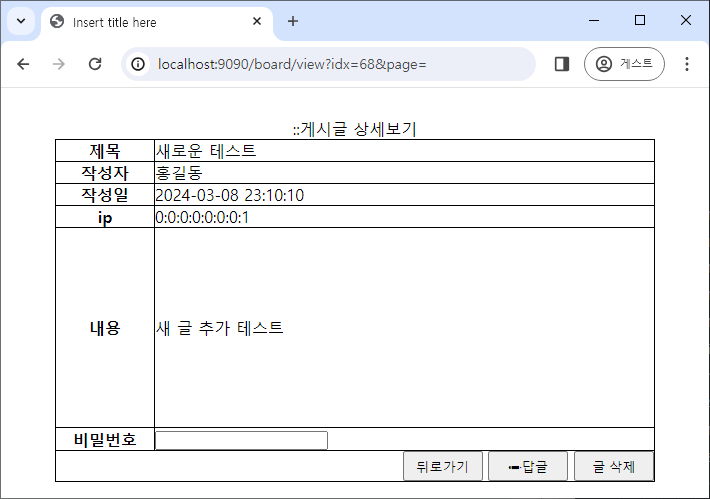
- 새 글이 추가되면 글 상세보기에서도 작성한 내용을 확인할 수 있다.
- 답글 작성은 새 글 작성과 비슷하다.
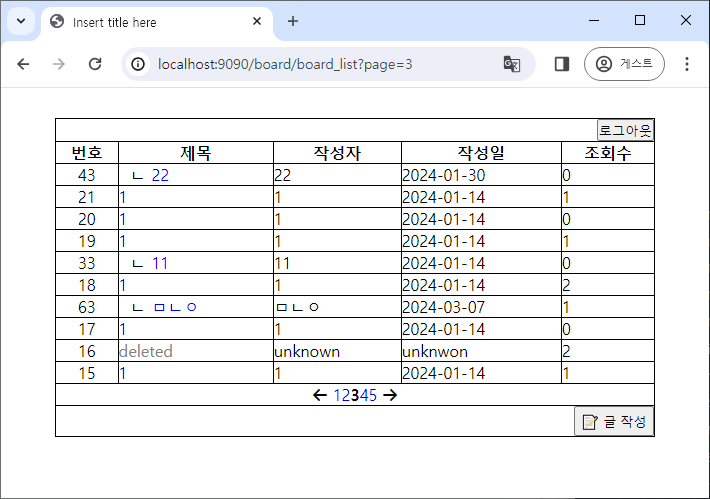
- 다른 페이지 번호를 누르면 다른 게시글 목록을 확인할 수 있으며, 생성 날짜가 다른 것을 확인할 수 잇다.
- 삭제 버튼을 누를 때 비밀번호가 같아야만 삭제가 가능하며, 삭제 전에 한 번 더 묻는 alert 창이 뜬다.
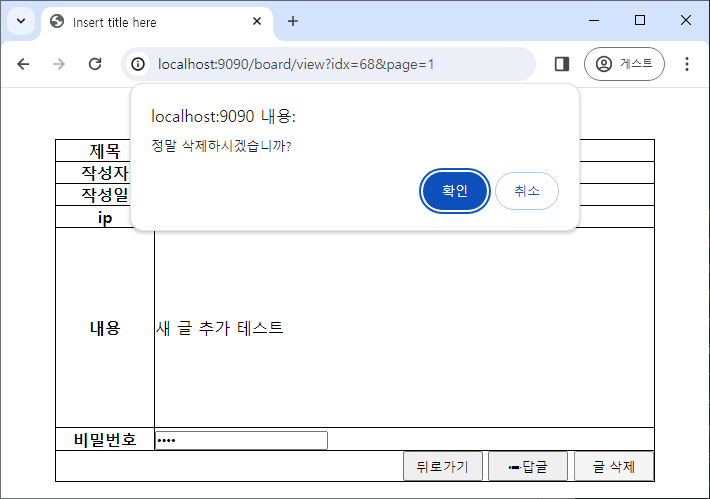
- 글이 삭제되면 클릭할 수 없고, 글의 정보도 확인할 수 없다.
- 회원 가입 시 중복 체크를 통과해야만 회원 가입할 수 있다.
- 중복 체크를 통과하고 다시 아이디를 기존 DB에 저장된 아이디로 바꿔서 가입하려 해도 input이 변경되면 중복체크 확인 변수가 false가 되므로 회원가입할 수 없다.