title과 favicon 변경
✒️ 2025-05-28 09:42 내용 수정
1. title 변경
- React에서 title을 변경하기 위해선
pulic/index.html에서<header>내의<title>을 수정해야 한다.- 여기서 수정하는 title은 모든 페이지에서 동일하게 적용되므로, 페이지별로 설정하려면 각 페이지에서 수정해야 한다.
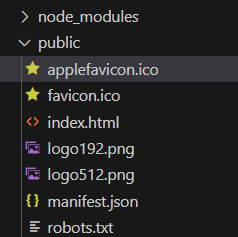
- 사진은 진행하던 프로젝트에서의
pulic폴더이다.

<!DOCTYPE html>
<html lang="en">
  <head>
    <meta charset="utf-8" />
    <link rel="icon" href="%PUBLIC_URL%/favicon.ico" />
    <meta name="viewport" content="width=device-width, initial-scale=1" />
    <meta name="theme-color" content="#000000" />
    <meta
      name="description"
      content="Web site created using create-react-app"
    />
    <link rel="apple-touch-icon" href="%PUBLIC_URL%/logo192.png" />
    <link rel="manifest" href="%PUBLIC_URL%/manifest.json" />
	<!-- title을 변경-->
    <title>새로운 타이틀</title>
  </head>
  <body>
    <noscript>You need to enable JavaScript to run this app.</noscript>
    <div id="root"></div>
  </body>
</html>

- 각 페이지별로 title을 다르게 설정할 때
useEffect를 사용하거나,Helmet라이브러리를 사용하여 설정할 수 있다.
import { useEffect } from 'react';

function Test() {

	useEffect(()=>{ // 타이틀 설정
		document.title = "페이지별 이름";
	}, []);

	return(<></>)
}
2. favicon 변경
-
png 파일이나 svg 파일 등을 favicon으로 사용할 때 ico 파일로 변경하고 싶다면 아래 사이트에서 변환할 수 있다.
-
favicon을 수정할 때
pulic/index.html에서<header>내에서<link>태그를 이용하여 수정할 수 있다.- 파일은
public/내에 위치해야 하며, 파일 위치는%PUBLIC_URL%을 사용하여 가져온다
- 파일은
<!-- 변경할 파일 이름으로 설정 -->
<link rel="icon" href="%PUBLIC_URL%/applefavicon.ico">
<!-- public/index.html -->
<!DOCTYPE html>
<html lang="en">
  <head>
    <meta charset="utf-8" />
    <link rel="icon" href="%PUBLIC_URL%/favicon.ico" />
    <meta name="viewport" content="width=device-width, initial-scale=1" />
    <meta name="theme-color" content="#000000" />
    <meta
      name="description"
      content="Web site created using create-react-app"
    />
    <link rel="apple-touch-icon" href="%PUBLIC_URL%/logo192.png" />
    <link rel="manifest" href="%PUBLIC_URL%/manifest.json" />
	<!-- 새 아이콘 추가 -->
	<link rel="icon" href="%PUBLIC_URL%/favicon.ico">
	<!-- title을 변경-->
    <title>새로운 타이틀</title>
  </head>
  <body>
    <noscript>You need to enable JavaScript to run this app.</noscript>
    <div id="root"></div>
  </body>
</html>