URL 모듈과 이미지 파일 미리보기 기능 만들기
✒️ 2025-05-26 14:22 내용 수정
- React로 개인 프로젝트를 진행하면서 파일 업로드 기능을 만들고 있는데, 이미지 파일을 미리 보는 기능이 필요하여 React 팀 프로젝트에서 사용했던 기능을 적용하였다.
- React 내용도 참고.
- 이후에도 자주 사용할 기능일 것 같아서 이를 메모해뒀다.
- 기능의 목표는
<input type="file">태그로 이미지 파일을 받았을 때<img>에 이미지 파일을 표시하는 것이다.- 서버 구성에 관한 내용은 생략하였다.
URL 모듈
URL을 처리하고 조작할 수 있는 유틸리티 기능을 제공하는 node 모듈
- 공식 문서 : https://nodejs.org/api/url.html#url
- 아래 예시는 공식 문서의 내용을 가져왔다.
const url = require('node:url');

const testUrl = new URL('https://user:pass@sub.example.com:8080/p/a/t/h?query=string#hash');
- 메소드 일부
URL.createObjectURL(blob): 주어진<Blob>객체를 표시하고 나중에 회수할 수 있는 URL string을 생성한다.- 등록된
<Blob>에 저장된 데이터는URL.revokeObjectURL()메소드가 호출되어 제거될 때까지 메모리에 저장된다.
- 등록된
URL.revokeObjectURL(id):id는 이전에URL.createObjectURL()메소드에 의해 반환되는 URL이며, 주어진id로 식별되는 저장된<Blob>데이터를 제거한다.
const { Blob, resolveObjectURL } = require('node:buffer');

const blob = new Blob(['hello']);
const id = URL.createObjectURL(blob);

const otherBlob = resolveObjectURL(id); // 이전에 저장된 blob 데이터를 가져옴
URL.revokeObjectURL(id); // id로 식별되는 저장된 Blob 데이터를 제거함
- 이 기능을 사용하여 파일 또는 미디어 객체를 브라우저의 메모리에 임시 URL로 생성하여 이미지를 렌더링하거나 다운로드 링크를 만들 수 있다.
function handleFileUpload(event) {
	const file = event.target.files[0];
	const fileURL = URL.createObjectURL(file); // 파일에 접근할 수 있는 임시 URL

	// <img id="imgBox">와 같은 태그에서 URL로 업로드한 파일을 미리볼 수 있다.
	document.getElementById('imgBox').src = fileURL;
}
이미지 업로드 페이지
- 코드는 React Component로 작성하였다.
- 해당 페이지에선 파일을 업로드할 때 이미지 파일을 미리 볼 수 있고, 파일을 서버로 전송하는 기능을 만들었다.
- 실제 전송은 서버측 설정도 필요하므로 생략하였다.
- Bootstrap을 사용하여 Form과 Input의 디자인을 수정하고, OverlayTrigger와 Tooltip Component로 마우스를 특정 요소에 올려놓으면 안내 문구가 뜨는 기능을 추가하였다.
// FileTest Component
import styles from 'styles/pages/server/fileTest.module.css';
import { Form, InputGroup, OverlayTrigger, Tooltip } from "react-bootstrap";
import { Camera, XCircle } from 'react-bootstrap-icons';
import { useState } from 'react';

function FileTest() {
    // form 데이터
    const [formData, setFormData] = useState({
        name: '',
        photo: null,
    });

    // 변경할 파일 미리보기 url
    const [fileUrl, setFileUrl] = useState('');

    // form 데이터 등록
    // input에 내용을 입력하면 formData에 같은 이름의 속성의 value가 변경됨
    function handleChange(event) {
        const { name, value } = event.currentTarget;
        setFormData((prev) => ({
            ...prev,
            [name] : value,
        }));
    }

    // 파일 변경
    // 파일을 받는 input에 적용할 변경 함수
    // input[type="file"]은 files 배열을 받는다.
    function handlePhotoChange(event) {
        const { files } = event.currentTarget;
        setFormData((prev) => ({
            ...prev,
            "photo" : files[0],
        }));

        // URL 모듈로 업로드한 파일 미리보기 url 생성
        const currentImageUrl = URL.createObjectURL(files[0]);
        // 파일 미리보기 URL을 state에 저장
        setFileUrl(currentImageUrl);
    }

    // 업로드할 파일 삭제(파일 업로드 취소)
    function handleFileUploadQuit() {
		// 임시저장한 파일 제거
        URL.revokeObjectURL(fileUrl);
        setFormData((prev)=>({
            ...prev,
            "photo" : null,
        }));
        // 파일 미리보기 URL도 빈 값으로 만든다.
        setFileUrl('');
    }

    // 서버에 요청 전송
    async function handleSubmit(event) {
        event.preventDefault();

        // 전송할 formData 객체 생성
        // 파일을 전송할 때 "form-data/multipart"와 같은 형식을 서버에 전송할 수 있도록
        // FormData 객체를 생성하여 정보를 담아준다.
        const formDataToSend = new FormData();
        // formData에 있는 keys들에 대해 photo인 경우를 제외하고 formDataToSend에 추가한다.
        Object.keys(formData)
	        .filter(key => key !== "photo")
	        .forEach((key)=>{formDataToSend.append(`${key}`, formData[key]);});

        // **** 파일이 있는 경우에만 첨부한다. ****
        // 만약 그냥 {photo: null} 이라도 FormData에 넣는 경우
        // 서버에서 type mismatch 에러가 발생할 수 있다.
        if (formData.photo) {
            formDataToSend.append("photo", formData.photo);
        }

        try {
            // 서버에 데이터를 보내는 요청
            // const res = await axios.post('http://localhost:8080/file', formDataToSend);
        } catch (error) {
        }
    }

    // 사진 미리보기 생성
    function ImageBox() {
	    // 파일을 업로드한 경우 handlePhotoChange()에서 formData를 수정
        if (formData.photo) {
            return(
                <img src={fileUrl}  // 파일 미리보기 URL이다.
                alt="testImg"
                className={styles.file_img}/>
            )
        } // 업로드한 파일이 없는 경우 Bootstrap-icon의 카메라 이미지를 출력
        else {
            return (
                <div className={styles.file_default_img}>
                    <Camera/>
                </div>
            )
        }
    }

    return(
        <div className={styles.container}>
            <h2 className={styles.title}>파일 미리보기 테스트</h2>
            <Form onSubmit={handleSubmit} {/* 제출 시 callback함수를 등록 */}
            className={styles.box}>
                <div className={styles.top_box}>
                    <OverlayTrigger {/* overlay를 발동시킬 요소를 감쌀 때 사용*/}
                    placement='top' {/* overlay의 위치*/}
                    {/* 출력할 내용*/}
                    overlay={<Tooltip>업로드할 사진을 삭제합니다</Tooltip>}>
                        <button type="button" {/* 버튼의 기본 타입은 "submit"임을 주의 */}
                        className={styles.remove_img_btn}
                        onClick={handleFileUploadQuit}>
                            <XCircle/> {/* Bootstrap-icon */}
                        </button>
                    </OverlayTrigger>
                    <OverlayTrigger
                    placement='top'
                    overlay={<Tooltip>사진을 업로드하려면 여기를 누르세요</Tooltip>}>
                        <div className={styles.img_box}>
                            <label htmlFor='photo'>
                                <ImageBox/> {/* 사진 미리보기 요소 */}
                            </label>
                            <input type='file'
                            accept="image/*" {/* 이미지 파일 형식만 허용 */}
                            id="photo" name="photo"
                            onChange={handlePhotoChange}/>
                        </div>
                    </OverlayTrigger>
                </div>
                <div className={styles.info_box}>
                    <Form.Group md="4" controlId="name" className={styles.form_box}>
                        <InputGroup className="mb-3"> {/* Bootstrap의 input 그룹 */}
                            {/* label과 비슷 */}
                            <InputGroup.Text id="name">사진 이름</InputGroup.Text>
                            <Form.Control {/* input 태그 역할과 동일 */}
                            type='text'
                            aria-label="name"
                            name="name"
                            onChange={handleChange}
                            />
                        </InputGroup>
                    </Form.Group>
                </div>
            </Form>
            <div className={styles.btn_wrap}>
                <button className={styles.upload_btn}
                onClick={handleSubmit}>확인</button>
                <button className={styles.del_btn}>취소</button>
            </div>
        </div>
    )
}

export default FileTest;
- 위 Component에 적용한 css 파일로, 대략적인 배치와 디자인을 수정하였다.
<label>에 적용된 설정은 기본 이미지나 미리보기 이미지를 눌렀을 때 자동으로<input>태그 상호작용이 적용되어 업로드할 파일을 찾는 창이 뜨도록 한다.
/* custom options */
:root{
    --green-color-l: #ebfffe;
    --green-color-ml: #8be6e1;
    --green-color-m: #007a60;
    --green-color-dm: #013d39;
    --green-color-d: #001b19;
    --red-color-l: #ff6161;
    --red-color-m: #e20909;
    --red-color-d: #9c0000;
    --blue-color-l: #6186ff;
    --blue-color-d: #001e80;
}

/* 기본 설정 */
*{margin:0; padding: 0; box-sizing: border-box;}
ul, ol, li{list-style-type: none;}
a{text-decoration: none; color:#000;}

.container{
    width: 90%;
    margin: 50px 0;
    position: relative;
}

.title{
    width: 80%;
    margin-bottom: 20px;
    text-align: left;
    white-space: nowrap;
    overflow: hidden;
    text-overflow: ellipsis;
}

.box{
    width: 100%;
    padding: 20px;
    background-color: var(--green-color-m);
    border-radius: 10px;
}

.top_box{
    width: 100%;
    position:relative;
}

/* 업로드 취소 버튼 */
.remove_img_btn{
    position: absolute; top: 10px; right: 10px;
    display: flex; justify-content: center; align-items: center;
    background-color: white;
    border-radius: 100%;
    z-index: 1000;
    font-size: 30px;
}

/* 이미지의 상위 박스 */
.img_box{
    width: 100%; height: 450px;
    margin-bottom: 5px;
    border: 1px solid white;
    border-radius: 5px;
    position: relative;
}

/* 미리보기 이미지 */
.file_img{
    width: 100%; height: 100%;
}

/* 기본 이미지 */
.file_default_img{
    display: flex; justify-content: center;
    align-items: center;
}

/* 이미지들을 감싸는 라벨 설정으로, input 태그를 가려줄 수 있음 */
.img_box label{
    width: 100%; height: 100%;
    position: absolute;
    display: flex; justify-content: center;
    align-items: center;
    background-color: white;
    font-size: 8rem;
}

/* input을 투명하게 만들고, 마우스를 올리면 포인터로 표시*/
.img_box input{
    width: 100%; height: 100%;
    position: absolute;
    opacity: 0;
    cursor: pointer;
}

.info_box{
    margin-top:30px;
}

.btn_wrap{
    width: 100%;
    padding-top: 20px;
    display: flex; justify-content: flex-end;
}

.upload_btn{
    margin-right: 5px;
    padding: 7px;
    color:white;
    background-color: var(--blue-color-l);
    font-size: 1rem;
    transition: 0.2s;
}

.del_btn{
	padding: 7px;
	color:white;
	background-color: var(--red-color-l);
	font-size: 1rem;
	transition: 0.2s;
}
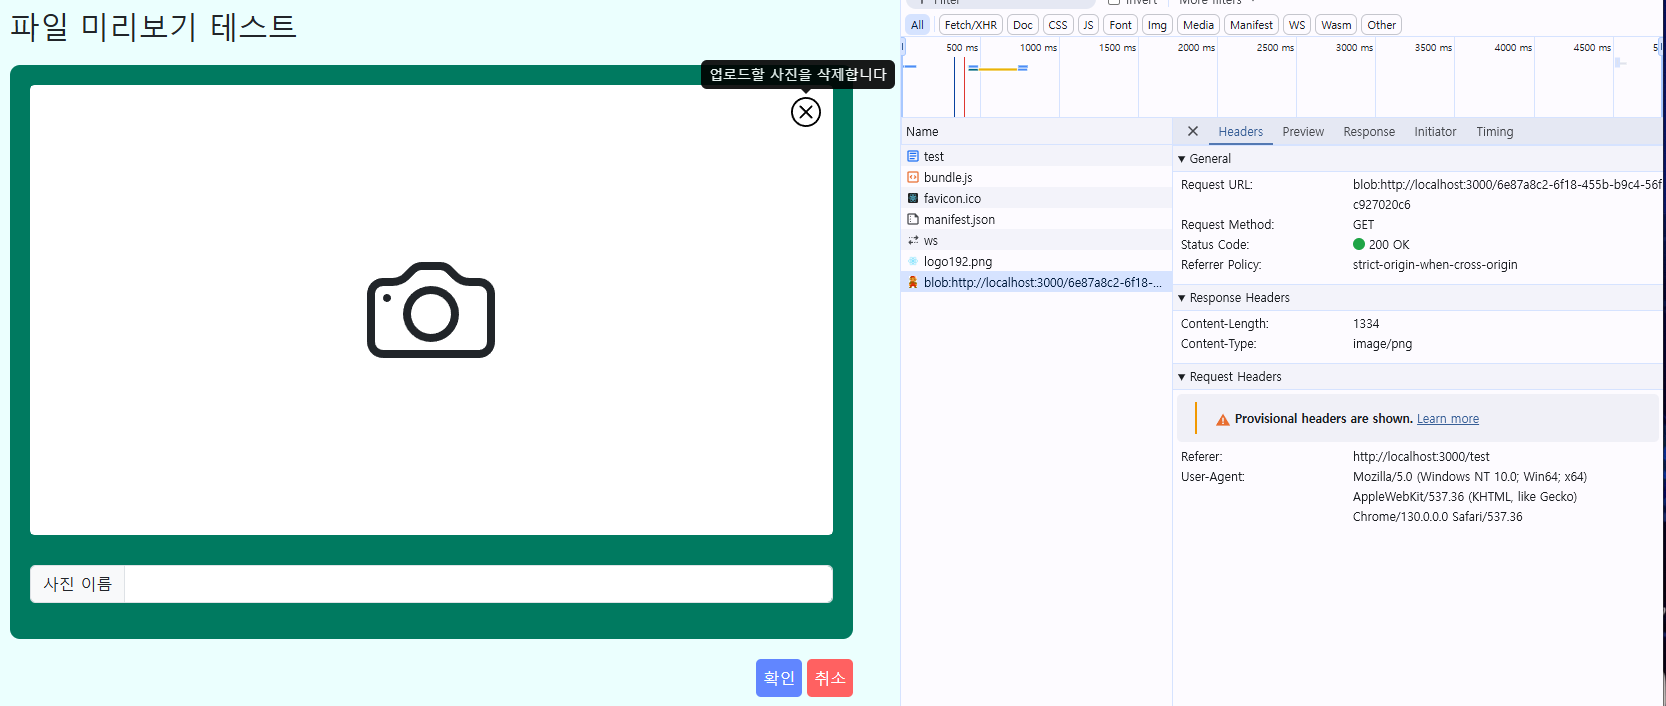
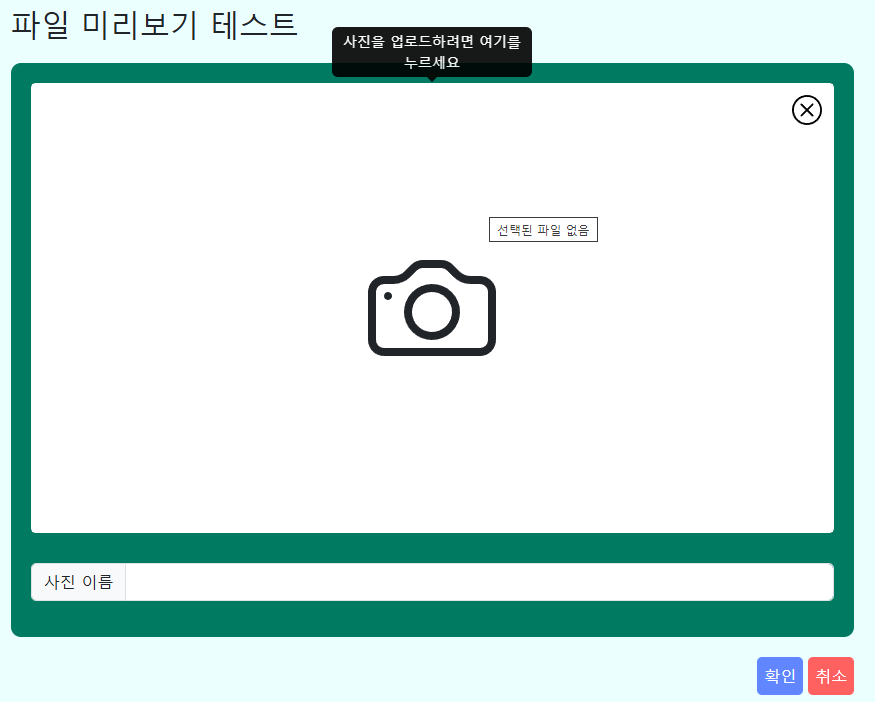
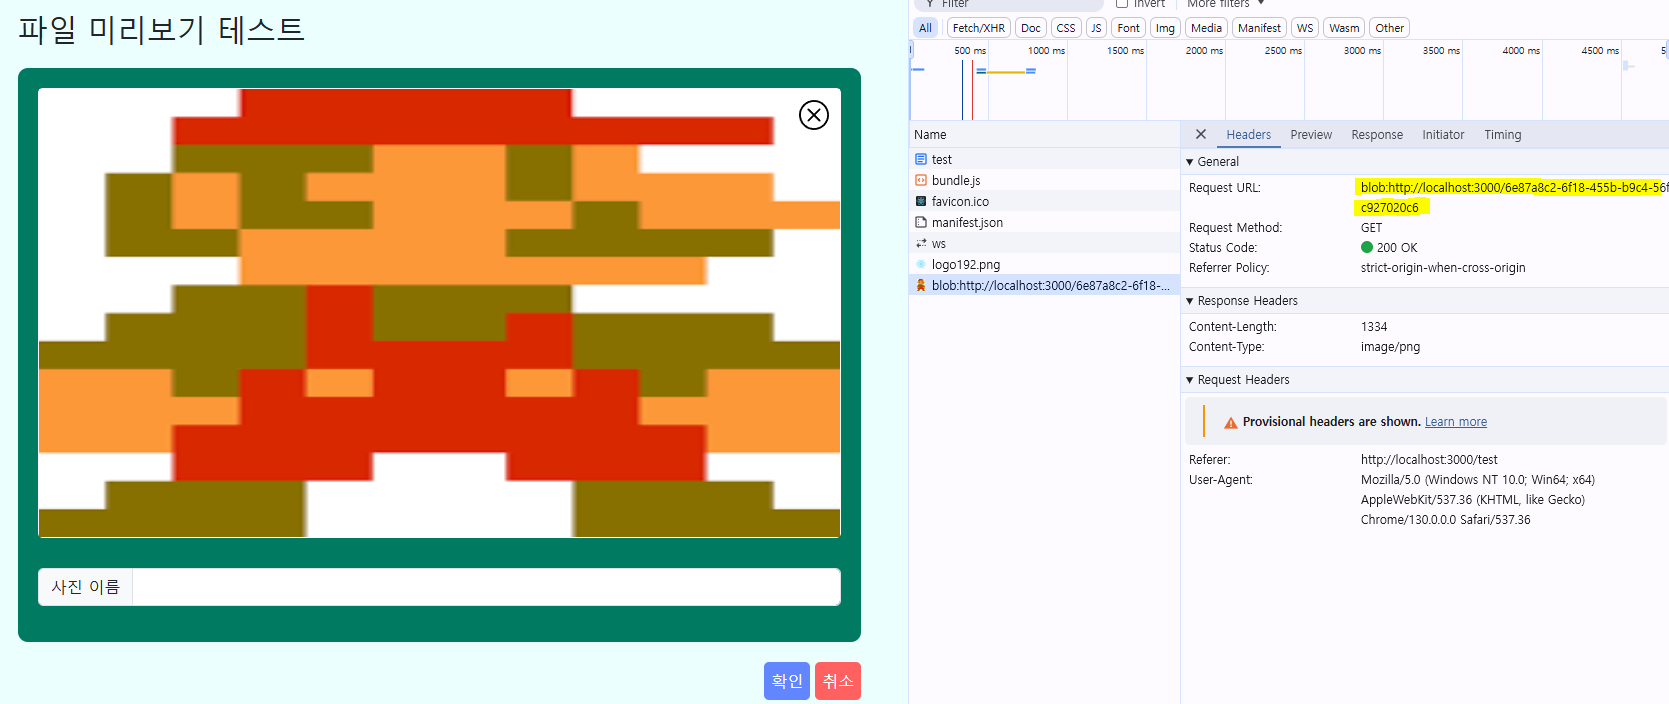
- 코드를 완성한 결과로, 마우스를 중앙 사진에 올려놓으면 Tooltip이 뜨고, 클릭 시 파일을 선택할 수 있다.
- 업로드 파일 제거 버튼을 누르면 미리보기 이미지에서 파일이 제거된다.